Home » Archives for Tony Wilkinson » Page 4

Author: Tony Wilkinson

allergy-friendly flooring

Allergy-Friendly Flooring: Understanding Carpets and Your Health

If you find yourself battling sniffles, itchy eyes, or a stubborn cough within your own home, you’re not alone. Allergies affect millions of people, and surprisingly, elements within our living spaces can play a significant role in triggering symptoms.  Flooring choices are often overlooked, but understanding their impact can make a world of difference for allergy sufferers.

Debunking Carpet Myths

It’s a common misconception that if you have allergies, carpets are simply off-limits. While certain types may be less ideal, the right carpet choices and proper care can actually contribute to improved air quality in your home.  Let’s explore this complex relationship.

Carpets and Allergens: The Complex Truth

Carpets are often seen as a cosy and comfortable addition to our homes, but they can also play a role in trapping allergens, which can be a significant concern for individuals with allergies or asthma. Here’s how carpets can act as allergen traps and the potential benefits and considerations to keep in mind:

  1. Allergen Trapping: Carpets have a unique structure that consists of densely packed fibres, which can act as a sort of sponge for common allergens like dust mites, pet dander, pollen, and even mould spores. These irritants can become embedded within the carpet fibres, potentially triggering allergic reactions when they are disturbed or released into the air.
  2. Potential Benefits: Although carpets can trap allergens, they can also function as a large filter. When allergens settle onto the carpet rather than circulating freely in the air, regular vacuuming and proper maintenance can remove them from your environment. This trapping effect potentially improves the air you breathe by reducing the amount of allergens in circulation.
  3. Fibre Type Significance: The material of your carpet plays a significant role in its ability to trap or release allergens. Wool fibres possess natural antimicrobial properties that can help reduce allergens and inhibit the growth of dust mites. Synthetic options, such as nylon and polyester, often offer superior stain resistance and easier deep cleaning, which can be advantageous for maintaining a hygienic floor.
  4. Vacuuming and Maintenance: Regular vacuuming is essential for managing allergens trapped in carpets. Using a vacuum cleaner with a HEPA (high-efficiency particulate air) filter can effectively remove small particles like dust mites and pollen. Proper maintenance, including regular cleaning and spot removal, can prevent the build-up of allergens and keep your carpet hygienic.
  5. Low-Pile Carpets: For individuals with severe allergies, low-pile carpets or hard flooring may be a better option. Low-pile carpets have shorter fibres that trap fewer allergens, making them easier to vacuum and clean. Hard flooring, such as wood or tile, does not trap allergens as easily and can be more effectively cleaned with a damp mop or vacuum.

By understanding how carpets can trap allergens, considering fibre type, and implementing effective vacuuming and maintenance practices, individuals with allergies can potentially mitigate the impact of allergens in their living spaces and enjoy the comfort and warmth that carpets provide.

Making Informed Flooring Choices

  • Low-Pile and Loop Options: Low-pile or tightly looped carpets are an excellent choice for allergy sufferers as they minimize the space where allergens can become deeply embedded. This makes them easier to clean and reduces the risk of irritants becoming trapped in the carpet fibers. The tightly woven loops prevent allergens from getting deep into the carpet and makes it easier to vacuum and remove them.
  • Stain-Resistant Treatments: Stain-resistant treatments provide an additional layer of protection against allergens and irritants. These treatments protect the carpet fibres from absorbing spills, preventing stains that can trap allergens and encourage mould growth. Easier-to-clean surfaces are a significant advantage for allergy-sensitive households, as they help to minimize the amount of time and effort required to keep the carpet clean.
  • Hardwood with Considerations: While hardwood or laminate flooring is often considered an allergy-friendly alternative to carpet, it is essential to consider its limitations. Hardwood and laminate do not have the same ability to trap allergens as carpet. This means allergens can more easily recirculate in the air, increasing exposure for allergy sufferers. Area rugs placed on hard flooring can provide some benefits, but they require proper maintenance and regular cleaning to prevent them from becoming a source of allergens themselves.

Beyond the Flooring: Essential Maintenance Tips

  • The Vacuuming Power Duo: Invest in a vacuum fitted with a HEPA filter designed to capture even the smallest particles. This is crucial whether you have carpet or hardwood floors.
  • Cleaning Frequency Matters: Vacuum high-traffic carpeted areas several times a week. Hardwood floors also benefit from regular vacuuming or dry mopping to remove dust and allergens.
  • Don’t Forget the Underlay: For carpet installations, choose a breathable, high-quality underlay. This promotes air circulation and reduces the risk of trapped moisture that can encourage mould.
  • Professional Cleaning: Periodic deep cleaning, whether for carpets or hard floors, removes embedded allergens that regular vacuuming can’t reach. Professionals are equipped for the most thorough, allergy-conscious clean.

Additional Considerations for Allergy Sufferers

  • Air Quality: To maintain optimal air quality in your home, consider these additional measures:
  • Air purifier: Consider investing in an air purifier with HEPA (High-Efficiency Particulate Air) technology to capture and remove allergens, dust, pollen, and other irritants from the air.
  • Dehumidifier: If you live in a humid climate, a dehumidifier can help reduce moisture levels in the air, making it less conducive to mold growth.

Controlling Dander: Implementing these additional strategies can help reduce pet dander levels:

  • Regular brushing: Brush your pets regularly to remove loose fur, dander, and other allergens from their coats.
  • Bathing: Bathe your pets once or twice a month to remove allergens and keep their coats clean.
  • Pet-free zones: Designate certain areas of your home, such as bedrooms, as pet-free zones to minimize allergen exposure in those spaces.

When Replacement is Necessary: If your allergies or asthma symptoms persist despite these measures, you may need to consider replacing your carpet with a more allergy-friendly flooring option.


Allergy-Friendly Flooring Options:

  • Hardwood: Hardwood floors are a durable and easy-to-clean option that can help reduce allergen buildup.
  • Laminate: Laminate flooring is a budget-friendly alternative to hardwood that also offers easy maintenance.
  • Tile: Tile flooring is a moisture-resistant and allergen-free option that is ideal for kitchens, bathrooms, and other high-traffic areas.
  • Bamboo: Bamboo flooring is a sustainable and hypoallergenic option that is naturally resistant to allergens and dust mites.

The Fitted Carpet Company: Your Partner in Creating a Healthy Home

At The Fitted Carpet Company, we understand the importance of a home environment that promotes health and well-being. Our experts are here to guide you towards flooring choices and maintenance routines to minimise allergy triggers and create a comfortable haven for you and your family.

Don’t let allergies control your home! Explore our website for further information on allergy-friendly flooring options and book a consultation for personalised advice.

carpet fitting

Reliable Carpet Fitting in Hawkhurst, Kent: Quality and Expertise

Choosing the right flooring solution and ensuring perfect installation is paramount to creating a home that is both beautiful and functional. At The Fitted Carpet Company, we understand these priorities. For decades, we’ve been serving the Hawkhurst community with expert carpet fitting and an extensive range of high-quality flooring products  –  helping homeowners elevate their spaces with confidence.

The Importance of Professional Carpet Installation

While tackling a flooring project yourself might seem tempting, professional fitting offers numerous benefits that ensure the longevity and visual appeal of your investment.  Expert fitters possess:

  • Technical Skills: Precision cutting, seaming techniques, and stretching carpets correctly are essential to avoid costly mistakes and achieve a flawless finish.
  • Proper Tools: Specialised equipment ensures a secure and long-lasting installation.
  • Experience: Experienced fitters understand the nuances of different materials and subfloors, anticipating and overcoming potential challenges with ease.

Your One-Stop Shop for Flooring Excellence

The Fitted Carpet Company is proud to offer a comprehensive selection of flooring solutions and expert fitting services, tailored to the discerning homeowners of Hawkhurst.

  • Exquisite Luxury Carpets: From plush, high-pile carpets for ultimate comfort in bedrooms to durable, low-pile options ideal for busy living rooms, we source carpets renowned for their luxurious feel, superb craftsmanship, and enduring style.
  • Karndean and Amtico Luxury Vinyl: Enjoy the timeless elegance of wood or stone without the maintenance of Karndean and Amtico’s stunning luxury vinyl tile collections. Exceptionally realistic designs and unwavering durability make them an excellent choice for high-traffic areas of your home.
  • Natural Coir Matting: Introduce the enduring charm and practicality of coir matting to your entryway. These hard-wearing, natural fibre mats effortlessly complement the architectural styles found in Hawkhurst, keeping dirt and debris at bay.
  • Stylish Stair Runners: Transform your staircase with a bespoke stair runner. Not only do they add a touch of personality and elegance, but they enhance safety and reduce noise on stairs.
  • Professional Carpet Cleaning: Maintain the beauty of your flooring and improve your home’s air quality with our expert carpet cleaning services. Our deep cleaning methods eliminate dirt, allergens, and stains, extending the life of your carpets.

Why Choose The Fitted Carpet Company?

  • Personalised Approach: We offer complimentary in-home consultations to understand your unique vision and needs. Our expert guidance ensures you find the perfect flooring solution to match your home and lifestyle.
  • Commitment to Quality: Our meticulous installation standards, backed by workmanship guarantees, and our selection of top-tier products assure you of flooring that will stand the test of time.
  • Deeply Rooted in Hawkhurst: Our local knowledge of Hawkhurst homes and their unique requirements allows us to provide tailored recommendations and expert installation services you can trust.

Transform Your Home with Confidence

Let The Fitted Carpet Company elevate your Hawkhurst home with beautiful flooring, expertly installed. Explore our extensive collection online at https://www.thefittedcarpetco.co.uk/ or book your free in-home consultation today.  Contact us on 01580 753483 or via email at thefittedcarpetcompany@gmail.com for prompt and personalised service. We look forward to making your dream floors a reality!

neutral carpet colours

The Ultimate Guide to Neutral Carpet Colours

Neutral carpet colours have become the go-to choice for homeowners seeking a timeless and versatile flooring option. In this ultimate guide, we will talk about the various aspects of neutral carpet colours, exploring their benefits, popular options, tips for choosing the right one, and how to style them effectively.

What Makes a Carpet Colour Neutral?

Neutral colours in carpets typically encompass a spectrum of beiges, creams, greys, and sometimes even browns with soft undertones. These timeless shades don’t boast the same intensity as a vibrant blue or a bold red,  but instead create a sense of balance within a room.

The Benefits of a Neutral Carpet

  • Versatility: Neutral carpets work wonders with almost any design scheme. Whether your style leans toward contemporary minimalism, farmhouse chic, or cosy traditionalism, a neutral carpet complements them all.
  • Timeless Appeal: Unlike bold colours that can be tied to specific eras, neutral carpets offer a classic look that won’t easily go out of style.
  • Enhancing Natural Light: Lighter neutrals have the ability to reflect light and make a room feel brighter and more spacious.

Exploring the Spectrum of Neutrals

  • Warm Neutrals: Beiges, creams, warmer taupes, and the trendy ‘greige’ (a blend of grey and beige) create an inviting, comforting atmosphere. They work beautifully in bedrooms or living areas where you want to promote a relaxed ambience.
  • Cool Neutrals: Light greys, cool taupes, and off-white tones introduce a clean, contemporary feel. Consider these if your space has a modern edge or you want a sense of airiness.
  • Understanding Undertones: The key to choosing the right neutral lies in understanding undertones. Some may lean slightly yellow or pink (warm), while others might have hints of blue or green (cool). Pay attention to these nuances for the ideal match with your existing colours.

Popular Neutral Carpet Colours

  • Classic Creams: These ever-popular shades add a touch of softness and can make rooms feel bright and welcoming.
  • Contemporary Greys: Grey carpets in various shades have become a modern staple. Lighter greys keep spaces feeling open, while warmer, charcoal tones exude a sophisticated vibe.
  • Trendy Taupes: Offering both cool and warm undertones within a single hue, taupe carpets provide balance and blend seamlessly with both modern and traditional decor.

How to Choose Your Perfect Neutral

  • Room Size and Lighting: Smaller rooms often benefit from lighter neutrals that reflect light. In larger rooms or those with low natural light, you can consider mid-tone or even warmer neutrals.
  • Your Current Decor: Take cues from your furniture, wall colours, and accents. A warmer neutral would complement warm wood tones and vibrant accents, while a cooler neutral would work with a modern white kitchen or blue accents.
  • Textures and Patterns: Don’t fear that neutral equals boring! Choose a textured carpet in a cut and loop pile, or consider a subtle pattern within a neutral shade to add interest.

Styling Your Neutral Carpet

  • Layer Textures: Add throws, rugs, cushions, and furniture with different textures to give your space dimension and a luxurious feel.
  • Add Colourful Accents: Neutral carpets provide the perfect backdrop for pops of colour. Introduce bold artwork, patterned cushions, or a vibrant rug for contrast and personality.
  • Monochromatic Magic: Embrace a monochromatic scheme by layering various shades of the same colour on top of a neutral carpet for a chic and sophisticated look.

DIY Cleaning Tips

  • Act Quickly on Spills: Attending to spills immediately can prevent stains from setting in. Blot carefully, avoiding scrubbing.
  • Regular Maintenance: Vacuuming regularly is key to keeping your neutral carpet looking fresh.
  • Call in the Pros: Periodic professional deep cleaning will extend the life of your carpet and tackle tougher stains.

Ready to discover the perfect neutral carpet to transform your home? Visit The Fitted Carpet Company website to explore our wide selection of beautiful, high-quality carpets. Let our expert team help you find the ideal shade and texture to complement your space. Book a free in-home consultation for a personalised experience, or reach us directly for advice by calling 01580 753483 or emailing thefittedcarpetcompany@gmail.com. Start creating your dream space today!

pet friendly carpet

Pet Friendly Carpet Choices: Your Guide to Durable and Stylish Options

Pets enrich our lives in countless ways, but it’s no secret that sharing your home with furry companions can pose challenges for your flooring. Fear not, pet-loving homeowners!  By carefully considering the following factors and selecting a pet-friendly carpet, you can achieve a happy balance between a beautiful, stylish home and worry-free pet ownership.

Key Considerations for Pet-Friendly Carpet

  • Stain Resistance: Pet life comes with the occasional spill or mess. Opt for carpet fibres that boast superior stain resistance, with many featuring built-in treatments for extra protection.
  • Ease of Cleaning: Look for materials that respond well to spot cleaning and routine vacuuming. Consider pile types that facilitate the removal of pet hair and debris.
  • Durability: Our furry friends can bring a degree of wear and tear to our floors. Select a carpet that can withstand scratching, shedding, and the general hustle and bustle of playful paws.
  • Odour Control: Carpet options that resist the absorption of pet-related odours can contribute significantly to maintaining a fresh-smelling home.

Best Fibre Types for Pet Owners

  • Nylon: The All-Rounder:  Nylon’s reign as a top choice for pet-friendly homes is well-deserved. It possesses high tensile strength, meaning it resists wear and tear superbly. Nylon also bounces back readily from the weight of furniture and the scampering of paws, keeping traffic areas looking their best.  Its stain resistance, often enhanced with additional treatments, provides a major advantage for busy households with pets.
  • Wool: Naturally Durable and Repellent: Wool is a time-tested choice for high-traffic zones in the home. It possesses remarkable resilience due to its natural crimp.  Furthermore, wool’s inherent lanolin content provides natural resistance to water-based stains, a major plus when dealing with pet accidents. Wool carpets offer a luxurious touch and undeniable longevity.
  • Triexta: Stain-Fighting and Eco-Conscious: Triexta has taken the carpet industry by storm for good reason. This relatively new fibre offers exceptional inherent stain resistance, making spills far less stressful. Triexta also boasts environmentally-friendly qualities in its production process. If seeking a durable, easy-care carpet with a lower environmental impact, Triexta is worth serious consideration.
  • Polyester: Softness and Affordability:  Polyester carpet brings a balance of softness, stain resistance, and affordability for pet owners.  While it may not have the same level of strength as nylon, it’s a budget-conscious option that still fares well against everyday pet-related messes.  Its soft texture also makes it a comfortable choice for lounging areas enjoyed by both pets and their humans.

Ideal Pile Styles for Pets

  • Low-Pile Options: Short, densely woven carpets are excellent at disguising pet hair and less prone to snagging from claws. Think of these as the ‘stealth’ carpets for pet owners.
  • Cut and Loop Hybrids: These carpets combine the durability of looped fibres with the visual interest of cut fibres. They offer a fantastic middle ground, minimising snagging while adding a touch of texture.
  • Styles to Avoid: Steer clear of carpets with long, loose loops, as they’re particularly susceptible to snagging and unravelling with regular pet activity.

Balancing Style and Function (Because Your Home Matters!)

  • Trendy Pet-Friendly Colours: Explore a spectrum of colours that cleverly mask shedding or potential stains, from darker tones to those with subtle greys or patterns. Stay stylish whilst minimising the visual impact of pet life.
  • Clever Camouflaging: Introduce texture with a heathered carpet or a subtle pattern. This can beautifully disguise pet hair between cleanings, reducing your stress levels.

Pet-Friendly Carpet Maintenance: Your Cleaning Toolkit

  • Routine Vacuuming: Regularly removing pet hair and dander is essential. Choose a vacuum designed for pet hair for the best results.
  • Spot Cleaning: Act quickly on spills and accidents with pet-safe cleaning solutions. Blot rather than scrub to prevent stains from setting in.
  • Invest in a Carpet Cleaner: A portable carpet cleaning machine can be invaluable for tackling tougher spots or for periodic freshening of the entire carpet.
  • Professional Cleaning: For deep cleaning, odour removal, or stubborn stains, consider professional carpet cleaning services tailored to the needs of pet owners.

DIY Pet Stain Removal: The Gentle Approach

Many common pet stains can be treated effectively with simple, household ingredients. A solution of diluted white vinegar and water is often a great start. Avoid harsh chemicals that could damage your carpet or harm your furry friend.

DIY Pet Stain Removal: Your Toolkit

  • Clean white cloths or paper towels: For blotting up spills and messes.
  • White Vinegar: A natural cleaner and deodorizer.
  • Baking Soda: Excellent for absorbing odours and lifting stains.
  • Dish Soap (Mild): Helps cut through grease and grime.
  • Hydrogen Peroxide (3%): Use with caution. Effective for tackling stubborn stains, but always test on a hidden area first.
  • Spray Bottle: For mixing and applying your solutions.

Basic Pet Stain Removal Guide

  1. Act Quickly: The sooner you address the stain, the easier it will be to remove.
  2. Blot, Don’t Scrub: Blot up liquids with a clean cloth or paper towels. For solids, scoop up as much as possible with a spoon or dull knife. Scrubbing embeds stains deeper into carpet fibres.
  3. Vinegar Solution: In a spray bottle, mix one part white vinegar with two parts water. Spray the affected area, let it sit for a few minutes, then blot with a clean cloth.
  4. Baking Soda Sprinkle: For lingering odours, sprinkle baking soda over the area, let it sit for several hours, then vacuum thoroughly.
  5. Dish Soap Solution: Mix a few drops of mild dish soap with a cup of warm water. Apply a small amount with a cloth and gently work it into the stain. Blot with a clean, damp cloth.

For Tougher Stains

If the above methods don’t fully remove the stain, try a combination of hydrogen peroxide and dish soap  (use only on light-coloured carpets, always test in an inconspicuous spot first):

  • Mix one part hydrogen peroxide with one part mild dish soap in a clean spray bottle.
  • Apply to the stain, let it sit for a few minutes, and then blot it dry.

Important Notes

  • Always test any cleaning solution on a hidden area of your carpet before applying to a visible spot.
  • Avoid harsh chemicals and excessive amounts of water, which can damage carpet fibres.

Let Us Help You Find Your Perfect Pet-Friendly Carpet

Visit The Fitted Carpet Company to discover our extensive selection of carpets designed with pet owners in mind. Get free estimates and samples on our website or contact us directly on 01580 753483 or at thefittedcarpetcompany@gmail.com to get expert guidance.  Let’s create a stylish and welcoming home that caters to your entire family, furry friends included!

carpet fitting hawkhurst

Carpet Fitting: Elevating Your Space with Precision and Style

Carpet fitting is an integral aspect of interior design, influencing not only the aesthetic appeal of a space but also its comfort and functionality. Whether you’re revamping your living room or renovating your office, the way your carpet is fitted can make a substantial difference. In this article, we’ll explore the nuances of carpet fitting, from the importance of professional installation to considerations before fitting and trends shaping the industry.


Introduction

Definition of Carpet Fitting

Carpet fitting is the meticulous process of installing carpets in a way that not only enhances the visual appeal of a space but also ensures longevity and functionality. It involves precise measurements, subfloor preparation, and expert installation techniques.


Importance of Professional Carpet Fitting

Carpet fitting is more than just a task; it’s a crucial element that significantly impacts the overall aesthetics, functionality, and longevity of your carpet. While the allure of a DIY approach may seem tempting, the importance of professional carpet fitting cannot be overstated. Let’s delve deeper into the various aspects that highlight the significance of entrusting this task to skilled professionals.


1. Precision and Expertise

Professional carpet fitters bring a level of precision and expertise that is honed through years of experience. They have an in-depth understanding of different carpet types, ensuring that each material is handled and installed with the utmost care. This expertise is particularly valuable when dealing with intricate patterns, specialised textures, or carpets with unique features.


2. Maximising Carpet Lifespan

The longevity of your carpet is directly tied to how well it’s fitted. Professional fitters take measures to minimise wear and tear, ensuring that your investment lasts for years. Their expertise in stretching the carpet correctly, eliminating wrinkles, and securing it in place contributes to its durability.


3. Seamless Aesthetic Appeal

One of the most noticeable differences between DIY and professional carpet fitting is the seamless aesthetic achieved by the latter. Professional fitters ensure that carpet seams are virtually invisible, creating a visually appealing and cohesive look across the entire floor. This attention to detail elevates the overall aesthetic of your space.


4. Avoiding Common Pitfalls

DIY carpet fitting often comes with common pitfalls, such as inaccurate measurements, uneven stretching, or improper subfloor preparation. Professional fitters are well-versed in identifying and avoiding these pitfalls, resulting in a flawless installation that eliminates potential issues down the line.


5. Customised Solutions

Every space is unique, and professional carpet fitters recognize the importance of tailoring their approach to each specific environment. Whether it’s a residential home or a commercial space, professionals assess the unique requirements and provide customised solutions, ensuring the perfect fit and functionality.


6. Efficiency and Time-Saving

While DIY projects can stretch over days or even weeks, professional carpet fitting is an efficient process. Experienced fitters work swiftly without compromising on quality, minimising disruption to your daily routine. This efficiency is particularly valuable in commercial settings where time is of the essence.


7. Warranty and Guarantees

Professional carpet fitting often comes with warranties and guarantees. This provides peace of mind, knowing that any issues arising from the installation will be addressed promptly and without additional costs. DIY projects lack this assurance, leaving homeowners solely responsible for any errors or defects.


8. Enhanced Comfort and Safety

Beyond the visual appeal, professional carpet fitting contributes to the comfort and safety of the space. A well-fitted carpet eliminates tripping hazards, provides a comfortable underfoot experience, and ensures that the carpet remains securely in place, enhancing the overall safety of the environment.


9. Expert Recommendations

Professional fitters often act as valuable sources of advice and recommendations. From helping you choose the right carpet type for your space to suggesting maintenance tips, their expertise extends beyond the installation process, providing you with comprehensive guidance for the care and longevity of your carpet.


10. Cost-Efficiency in the Long Run

While professional carpet fitting may involve an initial investment, it proves to be cost-efficient in the long run. Avoiding the pitfalls and potential mistakes associated with DIY projects saves you money on repairs and replacements, ensuring that your carpet maintains its quality over time.


Benefits of Professional Carpet Fitting

Improved Aesthetic Appeal

Professional carpet fitting contributes significantly to the overall look and feel of a room. The precise alignment and seamless joins achieved by professionals create a polished and sophisticated appearance.


Prolonged Carpet Lifespan

The longevity of your carpet is directly influenced by how it’s fitted. Professionals ensure that the carpet is laid with precision, minimising wear and tear and extending its lifespan.


Enhanced Comfort and Safety

Properly fitted carpets provide a comfortable and safe environment. No one wants a carpet that bunches up or presents tripping hazards. Professional installation guarantees a snug fit, enhancing the overall comfort and safety of your living or working space.


Considerations Before Carpet Fitting

Choosing the Right Carpet

The journey of carpet fitting begins with selecting the right carpet. Consider factors such as material, pile, and colour that align with the aesthetic you desire and the functionality needed for the space.


Measuring the Space

Accurate measurements are crucial to avoid issues during installation. Whether it’s a single room or an entire house, precise measurements ensure that you purchase the correct amount of carpet and minimise wastage.


Subfloor Preparation

Before fitting any carpet, it’s essential to prepare the subfloor adequately. This includes cleaning, levelling, and addressing any imperfections that could affect the carpet’s appearance and lifespan.


DIY vs. Professional Carpet Fitting

Pros and Cons of DIY

DIY carpet fitting may seem like a cost-effective option, but it comes with challenges. Inaccurate measurements, improper stretching, and uneven seams are common issues that can arise.


Advantages of Professional Installation

Professional carpet fitting guarantees expertise and precision. Installers are trained to handle various challenges, ensuring that your carpet is fitted flawlessly. Additionally, professional fitting often comes with warranties, providing peace of mind.


Cost Considerations

While DIY may seem initially cheaper, the potential for errors can lead to additional costs for repairs and replacements. Professional installation, though an upfront investment, offers long-term value by avoiding common pitfalls.


Steps in Professional Carpet Fitting

Initial Assessment and Consultation

Professional carpet fitting begins with a thorough assessment of the space. Installers will discuss your preferences, assess the subfloor, and provide recommendations tailored to your needs.


Carpet Selection and Measurement

Once the assessment is complete, you’ll choose a carpet that aligns with your vision. Precise measurements will then be taken to ensure the correct amount of carpet is ordered.


Subfloor Preparation

Before laying the carpet, the subfloor undergoes meticulous preparation. This step includes cleaning, levelling, and addressing any issues that could impact the carpet’s appearance and performance.


Carpet Installation Techniques

The actual installation involves stretching the carpet to eliminate wrinkles, ensuring proper seam alignment, and securing the carpet in place. Professional installers use specialised tools and techniques to achieve a flawless result.


Common Mistakes to Avoid

Inaccurate Measurements

One of the most common mistakes is inaccurate measurements. Professional installers take precise measurements to ensure that the carpet fits seamlessly without excess or shortage.


Poor Subfloor Preparation

Neglecting subfloor preparation can lead to an uneven carpet surface, affecting both appearance and comfort. Professionals prioritise this step to guarantee a smooth and flawless installation.


Incorrect Carpet Type for the Space

Choosing the wrong carpet type for the space can result in premature wear and tear. Professionals guide you in selecting a carpet that suits the function and traffic levels of the area.


Aftercare and Maintenance Tips

Vacuuming and Carpet Cleaning

Regular vacuuming and occasional deep cleaning are essential to maintain the appearance and hygiene of your carpet. Use a vacuum cleaner with adjustable height settings to avoid damaging the fibres.


Handling Stains Promptly

Promptly addressing stains is crucial to prevent them from setting. Blot the stain with a clean, dry cloth and use a suitable carpet cleaner. Avoid harsh chemicals that could damage the carpet.


Periodic Professional Maintenance

While regular care is essential, periodic professional maintenance is recommended. Professional cleaners have the expertise and equipment to remove deeply embedded dirt and stains, extending the life of your carpet.


Carpet Fitting Trends

Sustainable and Eco-Friendly Options

As environmental consciousness grows, there’s a rising trend in sustainable and eco-friendly carpet options. Manufacturers are producing carpets made from recycled materials and employing eco-conscious production processes.


Innovative Patterns and Designs

Carpet design is evolving beyond traditional patterns. Modern trends include bold colours, geometric shapes, and innovative textures that add a contemporary flair to any space.


Expert Recommendations

Tips for Prolonging Carpet Life

Vinyl tile flooring is celebrated for its low-maintenance characteristics, offering a practical and visually appealing solution for various spaces. To ensure your vinyl tiles maintain their beauty and longevity, it’s crucial to employ the right cleaning methods. In this section, we will provide practical tips for routine cleaning, empowering you with the knowledge needed to preserve the pristine appearance of your vinyl tiles.


1. Regular Sweeping or Vacuuming: The Foundation of Cleanliness

a. Dust and Debris Removal:

Begin by sweeping or vacuuming the vinyl tile floor regularly to eliminate loose dirt, dust, and debris. This prevents abrasive particles from scratching the surface of the tiles over time.

b. Soft Bristle Brushes:

When using a broom or vacuum, opt for soft bristle brushes or vacuum attachments suitable for hard floors to avoid any potential damage to the vinyl tile surface.

2. Damp Mopping: Gentle and Effective

a. Use a Soft Mop:

For deeper cleaning, damp mop the vinyl tile floor using a soft mop. Microfiber mops are particularly effective, providing gentle yet thorough cleaning.

b. Mild Cleaning Solutions:

Mix a solution of mild dish soap or a specialised vinyl floor cleaner with warm water. Avoid harsh chemicals or abrasive cleaners that can damage the protective layer of the vinyl tiles.

c. Wring Out Excess Moisture:

Ensure the mop is well-wrung before applying it to the floor. Excess moisture can seep into seams or edges, potentially causing damage over time.

3. Addressing Spills Promptly: Prevention is Key

a. Immediate Clean-Up:

Attend to spills promptly to prevent staining. Use a soft cloth or paper towel to blot and absorb the liquid, followed by a gentle cleaning with the damp mop.

b. Avoid Standing Water:

Vinyl tile flooring is moisture-resistant, but standing water should still be avoided. Wipe up any spills promptly to prevent water from seeping into seams or edges.

4. Steering Clear of Harsh Chemicals: Protecting the Finish

a. Avoid Abrasive Cleaners:

Refrain from using abrasive cleaners, wax-based products, or harsh chemicals on vinyl tile flooring. These can damage the protective finish and compromise the overall appearance.

b. Vinyl-Safe Cleaners:

Choose cleaning products specifically designed for vinyl floors. These are formulated to clean effectively without causing harm to the vinyl surface.

5. Regular Inspection: Identifying Issues Early

a. Check for Damage:

Periodically inspect the vinyl tiles for any signs of damage, such as scratches, gouges, or worn areas. Addressing issues promptly can prevent further deterioration.

b. Addressing Wear and Tear:

In high-traffic areas, consider using rugs or mats to reduce wear on specific spots. This proactive approach can extend the lifespan of your vinyl tile flooring.

6. Avoiding Rubber or Sharp Objects: Preventing Damage

a. Rubber Backed Mats:

Use mats with non-rubber backing at entrances to prevent tracking in dirt. Rubber-backed mats can, over time, cause discolouration or damage to the vinyl surface.

b. Cushioning Furniture:

When moving furniture, use caution and consider placing protective pads underneath to prevent scratching or gouging the vinyl tiles.

7. Periodic Deep Cleaning: Restoring Shine

a. Occasional Deep Cleaning:

Schedule periodic deep cleaning sessions using a vinyl floor cleaner or a solution of white vinegar and water. Follow the manufacturer’s recommendations for deep cleaning intervals.

b. Avoid Steam Cleaners:

Steer clear of steam cleaners as the high temperature and moisture can damage the adhesive holding the vinyl tiles in place.


Conclusion


In conclusion, the process of carpet fitting plays a pivotal role in shaping both the visual appeal and functionality of a space. While the appeal of engaging in a do-it-yourself project is understandable, the advantages derived from professional carpet fitting are truly remarkable. From elevating the overall appearance to extending the lifespan of your carpet, the benefits underscore the significance of investing in expert installation.


Opting for professional installation guarantees not only a visually striking carpet but also one that withstands the trials of time, adding a touch of enduring comfort and sophistication to your home or office. The precision, expertise, and attention to detail brought by professional fitters ensure that every aspect of the installation is flawlessly executed.


For those considering a carpet upgrade, the decision to entrust the task to professionals is not just about immediate satisfaction; it is an investment in the long-term value and quality of your living or working space. To explore the possibilities of professional carpet fitting, we invite you to visit our website at www.thefittedcarpetco.co.uk or call us at 01580 753483. Discover how our team of experts can transform your space with the perfect blend of aesthetics and functionality, ensuring that your investment in a new carpet becomes a source of enduring joy and satisfaction.


FAQs – Your Carpet Fitting Queries Answered!

Q: Can I install a carpet myself, or is professional fitting necessary?

A: While DIY is an option, professional fitting ensures precision, longevity, and often comes with warranties for added peace of mind.


Q: How do I choose the right carpet for my space?

A: Consider factors like material, pile, and colour, aligning with your aesthetic preferences and the functionality needed for the space.


Q: What are the common mistakes to avoid during carpet fitting?

A: Inaccurate measurements, poor subfloor preparation, and choosing the wrong carpet type for the space are common pitfalls to avoid.


Q: How often should I clean my carpet, and what products should I use?

A: Regular vacuuming is essential, and occasional deep cleaning is recommended. Use suitable carpet cleaners, avoiding harsh chemicals.


Q: Are there sustainable carpet options available?

A: Yes, sustainable and eco-friendly carpet options made from recycled materials are increasingly popular in the market.

Karndean vinyl tile flooring in Kent & East Sussex

Vinyl Tile Flooring: Unveiling the Versatility and Durability

Vinyl tile flooring has rapidly become a leading choice for homeowners and interior designers alike, thanks to its remarkable versatility and durability. In this comprehensive guide, we will delve into the world of vinyl tile flooring, exploring its advantages, installation process, maintenance tips, and debunking common myths. Whether you’re planning a DIY project or considering professional installation, this article aims to be your go-to resource for understanding and appreciating the benefits of vinyl tile flooring.


Introduction

Definition of Vinyl Tile Flooring

Vinyl tile flooring, a synthetic flooring material, mimics the look of natural materials like wood or stone. It consists of individual tiles that can be easily installed, providing a cost-effective and aesthetically pleasing flooring solution.


Popularity and Versatility

The popularity of vinyl tile flooring can be attributed to its versatility. It is suitable for various spaces, including kitchens, bathrooms, and living areas. The vast array of designs and patterns available allows homeowners to achieve the desired aesthetic without compromising on durability.


Advantages of Vinyl Tile Flooring

Durability and Longevity

Vinyl tile flooring is known for its durability, making it a suitable choice for high-traffic areas. It can withstand the wear and tear of daily use, and with proper maintenance, it boasts an impressive lifespan.


Easy Installation and Maintenance

One of the standout advantages of vinyl tile flooring is its ease of installation. Whether you opt for DIY installation or professional assistance, the process is relatively straightforward. Additionally, maintenance is hassle-free, requiring simple cleaning routines to keep the flooring looking pristine.


Wide Range of Designs

Vinyl tile flooring offers an extensive range of designs, allowing homeowners to achieve the desired look for their space. From realistic wood textures to elegant stone patterns, the design options are virtually limitless.


Types of Vinyl Tile Flooring

Luxury Vinyl Tiles (LVT)

LVT is a premium vinyl flooring option that replicates the look and feel of natural materials with exceptional realism. It often comes with advanced features such as enhanced durability and realistic textures.


Vinyl Composite Tiles (VCT)

VCT is a more traditional vinyl tile flooring option, known for its affordability and durability. It is commonly used in commercial settings but can also be a practical choice for residential spaces.


Considerations Before Choosing Vinyl Tile Flooring

Subfloor Preparation for Vinyl Tile Flooring

The often-overlooked step of subfloor preparation plays a pivotal role in determining the success of your vinyl tile flooring installation. It serves as the foundation upon which your entire flooring structure rests, impacting the aesthetics, durability, and longevity of the final result. Let’s delve into why proper subfloor preparation is not just a preliminary task but a critical component in ensuring a flawless and enduring vinyl tile floor.


Importance of a Clean Subfloor

Before laying down a single vinyl tile, the subfloor must be meticulously cleaned. Any debris, dust, or irregularities on the subfloor’s surface can compromise the adhesive’s effectiveness and, consequently, the overall integrity of the installation. Sweeping away dust and removing any lingering particles are essential steps in creating a clean canvas for the vinyl tiles.


Achieving Level Surfaces

A level subfloor is fundamental for preventing unevenness in the vinyl tile flooring. Irregularities in the subfloor can lead to bumps or depressions, resulting in an unsightly and uncomfortable floor. Levelling compounds or fillers may be employed to address any uneven spots, ensuring a flat and consistent surface that sets the stage for a flawless vinyl tile installation.


The Crucial Element of Dryness

Ensuring a dry subfloor is equally crucial. Moisture can adversely affect the adhesive used to secure vinyl tiles, leading to issues such as warping or disintegration over time. Therefore, it is imperative to verify the subfloor’s dryness, especially in areas prone to dampness, such as basements or bathrooms. Moisture barriers may be applied if needed to safeguard the vinyl tiles from potential damage caused by underlying damp conditions.


Subfloor Material Considerations

Different subfloor materials require distinct preparations. For wooden subfloors, it’s essential to check for any signs of rot or damage, replacing compromised sections to guarantee stability. Concrete subfloors demand extra care to address issues like cracks or unevenness, often necessitating the application of a self-leveling underlayment.


Adhering to Manufacturer Recommendations

Each vinyl tile manufacturer may have specific recommendations regarding subfloor preparation. Adhering to these guidelines is vital to ensure warranty compliance and optimal performance of the vinyl tiles. Manufacturers often provide detailed instructions on acceptable subfloor conditions and necessary preparations, including the type of adhesives to be used.


Professional Assistance for Complex Cases

In cases where subfloor issues are complex or challenging to resolve independently, seeking professional assistance is a wise choice. Experienced flooring professionals possess the expertise to assess and address intricate subfloor conditions, guaranteeing a solid foundation for the vinyl tile installation. Their insights can prove invaluable in achieving a seamless and enduring flooring result.


The Long-Term Impact on Flooring Performance

The efforts invested in subfloor preparation directly correlate with the long-term performance of vinyl tile flooring. A well-prepared subfloor not only enhances the aesthetic appeal of the flooring but also contributes to its stability, reducing the likelihood of issues such as shifting, cracking, or premature wear.


Budget Considerations

Vinyl tile flooring offers a cost-effective solution compared to natural materials like hardwood or stone. Considering your budget constraints while exploring the diverse options ensures a practical and stylish flooring choice.


Environmental Impact

For environmentally conscious consumers, it’s essential to explore eco-friendly vinyl tile options. Some manufacturers offer sustainable choices that reduce the environmental impact without compromising on quality.


Vinyl Tile vs. Other Flooring Options

Vinyl Tile vs. Ceramic Tiles: A Duel of Durability

Durability

Vinyl tile and ceramic tiles both offer commendable durability, but they achieve it in different ways. Ceramic tiles are renowned for their robustness and resistance to scratches, making them suitable for high-traffic areas. On the other hand, vinyl tile, while durable, is more forgiving underfoot due to its softer composition, providing a more comfortable surface.

Maintenance

Maintenance is a crucial aspect of any flooring choice. Ceramic tiles, with their hard, glazed surface, are resistant to stains and water, making them easy to clean. Vinyl tiles, with their moisture-resistant properties, also offer easy maintenance but may require occasional resealing for enhanced protection.

Design Options

Both vinyl and ceramic tiles provide a diverse array of design options. Ceramic tiles often emulate natural materials like stone or marble, offering a classic aesthetic. In contrast, vinyl tiles are celebrated for their versatility, mimicking various materials, including wood and stone, and offering an extensive range of patterns and colours.


Vinyl Tile vs. Hardwood Flooring

Aesthetics

Hardwood flooring exudes a timeless and luxurious appeal, adding warmth and character to any space. Vinyl tile, however, has come a long way in replicating the natural look of wood, offering a more budget-friendly alternative without sacrificing aesthetics. The choice boils down to personal preference and the desired aesthetic for your home.

Practicality

Vinyl tile takes the lead in practicality, especially in areas prone to moisture or heavy foot traffic. It is water-resistant, resilient against scratches, and easy to maintain. Hardwood, while undeniably beautiful, requires more caution in moisture-prone areas and demands careful maintenance to preserve its appearance.

Maintenance

Hardwood flooring demands regular upkeep, including refinishing and sealing to maintain its appearance and protect against wear. Vinyl tile, being inherently low-maintenance, offers a hassle-free solution that retains its aesthetic appeal with simple cleaning routines.


Vinyl Tile Installation Process

DIY Installation Tips

If you’re inclined towards a do-it-yourself approach, we will provide step-by-step tips for a successful vinyl tile flooring installation. From preparing the subfloor to ensuring accurate measurements, this section aims to be your DIY guide.

  • Subfloor Preparation: The Foundation of Success
  • Clean and Clear:

Begin by thoroughly cleaning the subfloor. Remove any debris, dust, or irregularities that might interfere with the adherence of the vinyl tiles.

  • Level the Playing Field:

Ensure a level subfloor by addressing any uneven spots. Levelling compounds or fillers can be applied to create a flat surface, essential for achieving a professional-looking finish.

  • Check for Moisture:

Verify the dryness of the subfloor, especially in areas prone to dampness. Moisture can compromise the adhesive, leading to issues down the line. Apply moisture barriers if necessary.

  • Gather Your Tools and Materials: Be Prepared
  • Essential Tools:

Gather the necessary tools, including a utility knife, measuring tape, straight edge, notched trowel, and a rubber mallet. Having the right tools on hand ensures precision throughout the installation process.

  • Vinyl Tile Adhesive:

Choose a high-quality vinyl tile adhesive suitable for your specific flooring type. Follow the manufacturer’s guidelines regarding adhesive application and drying times.

  • Vinyl Tiles and Spacers:

Purchase vinyl tiles that suit your aesthetic preferences and the intended space. Additionally, acquire spacers to maintain consistent gaps between tiles during installation.

  • Plan Your Layout: Strategy Matters
  • Dry Run:

Before applying adhesive, conduct a dry run by laying out the vinyl tiles without adhering them to the subfloor. This allows you to assess the layout, make adjustments, and ensure a balanced appearance.

  • Start from the Centre:

Begin the installation from the centre of the room, working outward. This helps achieve a symmetrical look and minimises the need for cutting tiles at the edges.

  • Cutting Vinyl Tiles: Precision Matters
  • Accurate Measurements:

Measure and mark tiles accurately before cutting. A straightedge and a sharp utility knife ensure clean and precise cuts, particularly for tiles at the edges of the room.

  • Mind the Pattern:

Pay attention to the pattern and design of the vinyl tiles, especially if they have specific directional features. Aligning patterns correctly enhances the overall visual appeal.

  • Adhesive Application: The Glue Holding It Together
  • Follow Manufacturer Guidelines:

Adhere strictly to the guidelines provided by the vinyl tile adhesive manufacturer. Apply the adhesive evenly using a notched trowel, ensuring a sufficient layer for proper tile adherence.

  • Work in Sections:

Divide the floor into manageable sections to ensure that the adhesive doesn’t dry before laying the tiles. Work methodically, placing tiles firmly and using a rubber mallet if needed to set them in place.

  • Finishing Touches: Bringing It All Together
  • Use Spacers:

Insert spacers between tiles to maintain consistent gaps. This not only enhances the visual appeal but also accommodates potential expansion.

  • Wait for Adhesive to Cure:

Allow the adhesive to cure completely before moving furniture back into the space or engaging in regular foot traffic. Follow the recommended drying times provided by the adhesive manufacturer.

  • Post-Installation Cleanup: The Final Step
  • Remove Excess Adhesive:

Once the adhesive has cured, remove any excess adhesive from the tiles and clean the surface thoroughly. This ensures a polished and professional appearance.

  • Inspect and Enjoy:

Inspect the completed installation, checking for any loose tiles or irregularities. Once satisfied, step back and enjoy the fruits of your DIY labour.


Professional Installation Benefits

For those seeking professional assistance, we will delve into the benefits of hiring experts for vinyl tile flooring installation. Precision, efficiency, and a flawless finish are some of the advantages explored in this section.


Maintaining Vinyl Tile Flooring

Cleaning and Care Tips

Vinyl tile flooring is celebrated for its low-maintenance characteristics, offering a practical and visually appealing solution for various spaces. To ensure your vinyl tiles maintain their beauty and longevity, it’s crucial to employ the right cleaning methods. In this section, we will provide practical tips for routine cleaning, empowering you with the knowledge needed to preserve the pristine appearance of your vinyl tiles.

1. Regular Sweeping or Vacuuming: The Foundation of Cleanliness

a. Dust and Debris Removal:

Begin by sweeping or vacuuming the vinyl tile floor regularly to eliminate loose dirt, dust, and debris. This prevents abrasive particles from scratching the surface of the tiles over time.

b. Soft Bristle Brushes:

When using a broom or vacuum, opt for soft bristle brushes or vacuum attachments suitable for hard floors to avoid any potential damage to the vinyl tile surface.

2. Damp Mopping: Gentle and Effective

a. Use a Soft Mop:

For deeper cleaning, damp mop the vinyl tile floor using a soft mop. Microfiber mops are particularly effective, providing gentle yet thorough cleaning.

b. Mild Cleaning Solutions:

Mix a solution of mild dish soap or a specialised vinyl floor cleaner with warm water. Avoid harsh chemicals or abrasive cleaners that can damage the protective layer of the vinyl tiles.

c. Wring Out Excess Moisture:

Ensure the mop is well-wrung before applying it to the floor. Excess moisture can seep into seams or edges, potentially causing damage over time.

3. Addressing Spills Promptly: Prevention is Key

a. Immediate Clean-Up:

Attend to spills promptly to prevent staining. Use a soft cloth or paper towel to blot and absorb the liquid, followed by a gentle cleaning with the damp mop.

b. Avoid Standing Water:

Vinyl tile flooring is moisture-resistant, but standing water should still be avoided. Wipe up any spills promptly to prevent water from seeping into seams or edges.

4. Steering Clear of Harsh Chemicals: Protecting the Finish

a. Avoid Abrasive Cleaners:

Refrain from using abrasive cleaners, wax-based products, or harsh chemicals on vinyl tile flooring. These can damage the protective finish and compromise the overall appearance.

b. Vinyl-Safe Cleaners:

Choose cleaning products specifically designed for vinyl floors. These are formulated to clean effectively without causing harm to the vinyl surface.

5. Regular Inspection: Identifying Issues Early

a. Check for Damage:

Periodically inspect the vinyl tiles for any signs of damage, such as scratches, gouges, or worn areas. Addressing issues promptly can prevent further deterioration.

b. Addressing Wear and Tear:

In high-traffic areas, consider using rugs or mats to reduce wear on specific spots. This proactive approach can extend the lifespan of your vinyl tile flooring.

6. Avoiding Rubber or Sharp Objects: Preventing Damage

a. Rubber Backed Mats:

Use mats with non-rubber backing at entrances to prevent tracking in dirt. Rubber-backed mats can, over time, cause discolouration or damage to the vinyl surface.

b. Cushioning Furniture:

When moving furniture, use caution and consider placing protective pads underneath to prevent scratching or gouging the vinyl tiles.

7. Periodic Deep Cleaning: Restoring Shine

a. Occasional Deep Cleaning:

Schedule periodic deep cleaning sessions using a vinyl floor cleaner or a solution of white vinegar and water. Follow the manufacturer’s recommendations for deep cleaning intervals.

b. Avoid Steam Cleaners:

Steer clear of steam cleaners as the high temperature and moisture can damage the adhesive holding the vinyl tiles in place.


By incorporating these cleaning and care tips into your routine, you can ensure that your vinyl tile flooring remains not only low-maintenance but also retains its original lustre and appeal. Taking a proactive and gentle approach to cleaning will contribute to the long-lasting beauty of your vinyl tiles, making them a resilient and aesthetically pleasing choice for your home.


Expert Recommendations

Insights from Flooring Professionals

Flooring professionals share their expertise on vinyl tile flooring. From selecting the right type for your space to maintenance tips, their insights will guide you in making informed decisions for your flooring needs.


Tips for Maximising Vinyl Tile Flooring Benefits

Experts provide tips on how to make the most of your vinyl tile flooring. From choosing the right design for your space to extending the lifespan of your flooring, these recommendations are tailored for vinyl tile users.


Conclusion

In summary, vinyl tile flooring stands out as a practical and stylish choice for modern homeowners. Its durability, ease of installation, and wide range of designs make it a versatile solution for various spaces. Whether you opt for luxury vinyl tiles or traditional vinyl composite tiles, the benefits of this flooring option are undeniable.


Investing in vinyl tile flooring not only transforms the aesthetics of your space but also offers a long-lasting and low-maintenance solution. Whether you’re a DIY enthusiast or prefer professional assistance, vinyl tile flooring provides a cost-effective and visually appealing alternative to traditional flooring materials.


To explore the possibilities of vinyl tile flooring for your home, visit our website at www.thefittedcarpetco.co.uk or call us at 01580 753483. Discover how vinyl tile flooring can elevate your living spaces, providing a perfect balance of durability, style, and comfort.


FAQs – Your Vinyl Tile Flooring Queries Answered!

Q: Is vinyl tile flooring suitable for high-traffic areas like kitchens and hallways?


A: Yes, vinyl tile flooring is highly durable and a practical choice for high-traffic areas, offering both style and resilience.


Q: Can I install vinyl tile flooring over an existing floor?


A: In many cases, yes. Proper preparation of the existing floor is crucial for a successful vinyl tile installation.


Q: How do I choose between luxury vinyl tiles (LVT) and vinyl composite tiles (VCT)?


A: The choice depends on factors like budget, desired aesthetics, and the level of durability you require. LVT offers premium features, while VCT is a more budget-friendly option.


Q: What are the maintenance requirements for vinyl tile flooring?


A: Vinyl tile flooring is low-maintenance. Regular sweeping or vacuuming, along with occasional damp mopping, is usually sufficient to keep it looking pristine.


Q: Are there environmentally friendly options for vinyl tile flooring?


A: Yes, some manufacturers offer sustainable and eco-friendly vinyl tile options, ensuring that you can make an environmentally conscious choice for your flooring.

luxury vinyl flooring bathroom in Kent

Luxury Vinyl Flooring in Bathrooms: Elevating Elegance and Practicality

Luxury vinyl flooring has become a popular choice for homeowners looking to revamp their bathrooms with a touch of sophistication. From its waterproof properties to a myriad of design options, luxury vinyl offers a compelling alternative to traditional bathroom flooring materials.


Advantages of Luxury Vinyl Flooring in Bathrooms


Waterproof Properties

One of the standout features of luxury vinyl flooring is its waterproof nature. Unlike hardwood or laminate, luxury vinyl can withstand moisture, making it an ideal choice for bathrooms where spills and humidity are common. This inherent resistance to water ensures longevity and reduces the risk of damage caused by moisture.


Durability and Longevity

Luxury vinyl is renowned for its durability, making it a practical option for high-traffic areas like bathrooms. Its ability to resist scratches, stains, and dents ensures that your bathroom flooring remains in pristine condition for years. With proper care, luxury vinyl can outlast many other flooring materials, providing a cost-effective solution in the long run.


Variety in Design Options

When it comes to design, luxury vinyl flooring offers an extensive array of options. From realistic wood and stone textures to bold patterns and colours, homeowners can customise their bathroom floors to suit their unique style. This versatility allows for creative expression while maintaining the luxurious aesthetic associated with high-end flooring.


Installation Process of Luxury Vinyl Flooring in Bathrooms

1. Subfloor Preparation

Before embarking on the installation of luxury vinyl flooring in your bathroom, proper subfloor preparation is paramount. Start by ensuring the existing subfloor is clean, dry, and free from any debris. If there are imperfections or uneven surfaces, address them by levelling or smoothing the subfloor. This step creates a stable foundation for the luxury vinyl, ensuring a flawless and long-lasting installation.


2. Moisture Testing

Given the moisture-prone nature of bathrooms, it’s crucial to conduct moisture testing on the subfloor. Excessive moisture can compromise the adhesive and lead to issues like warping or mould growth. Use a moisture metre to assess the moisture content, and if it exceeds recommended levels, take steps to mitigate it before proceeding with the installation.


3. Acclimatisation of Luxury Vinyl

Allow the luxury vinyl flooring to acclimate to the bathroom environment before installation. This typically involves leaving the flooring material in the room for at least 48 hours. Acclimatisation helps the vinyl adjust to the temperature and humidity of the space, minimising the risk of expansion or contraction after installation.


4. Choosing the Right Adhesive

Selecting the appropriate adhesive is a critical aspect of the installation process. Different types of luxury vinyl may require specific adhesives, so it’s essential to follow the manufacturer’s recommendations. Opt for adhesives that are compatible with both the luxury vinyl material and the subfloor. This ensures a secure and long-lasting bond, preventing issues such as lifting or shifting over time.


5. Installation Patterns and Layout

Plan the layout of the luxury vinyl tiles or planks to create an aesthetically pleasing design. Consider the placement of seams and patterns, especially if you’re using tiles with specific designs or textures. Dry-fit the pieces before applying adhesive to ensure the layout aligns seamlessly and meets your design preferences.


6. Professional Installation vs. DIY

While luxury vinyl installation can be a rewarding DIY project for those with experience, many homeowners opt for professional installation. Professionals bring expertise, precision, and the necessary tools to ensure a flawless result. If you choose the DIY route, follow the manufacturer’s guidelines closely and take your time to avoid mistakes that could affect the flooring’s performance.


7. Adhering the Luxury Vinyl

Apply the adhesive according to the manufacturer’s instructions. Use a recommended trowel size to ensure an even distribution of adhesive. Press the luxury vinyl tiles or planks firmly into place, making sure to align them correctly. Work in small sections to prevent the adhesive from drying before you lay the flooring.


8. Trimming and Finishing

Once the majority of the luxury vinyl is installed, you may need to trim pieces to fit around corners, edges, or obstacles like toilets or vanities. Use a sharp utility knife or specialised vinyl cutting tool for precise cuts. Pay attention to details, as a well-finished installation contributes to the overall polished look of the bathroom flooring.


9. Post-Installation Cleanup

After the luxury vinyl is fully installed, clean any adhesive residue or marks from the surface. Be cautious with cleaning agents to avoid damage to the flooring. Follow the manufacturer’s recommendations for post-installation care to ensure the longevity and appearance of your newly installed luxury vinyl flooring.


10. Allow for Proper Curing Time

Before subjecting the newly installed luxury vinyl flooring to regular foot traffic or placing heavy furniture, allow for proper curing time. The curing time varies based on the type of adhesive used, environmental conditions, and the specific luxury vinyl product. Refer to the manufacturer’s guidelines to determine the appropriate waiting period before fully utilising the bathroom.


Navigating the installation process with attention to detail and adherence to guidelines ensures that your luxury vinyl flooring not only looks stunning but also performs optimally in the unique environment of a bathroom. Whether you choose to tackle the installation yourself or enlist professional help, a well-executed installation sets the stage for years of enjoyment and satisfaction with your bathroom flooring.

Maintenance Tips for Luxury Vinyl Flooring in Bathrooms

Luxury vinyl flooring is not only visually appealing but also low-maintenance, making it a practical choice for bathrooms. To keep your luxury vinyl flooring looking pristine and performing at its best, follow these essential maintenance tips:


1. Regular Cleaning Routine

Establishing a consistent cleaning routine is key to preserving the beauty of luxury vinyl flooring. Sweep or vacuum the floor regularly to remove dust, dirt, and debris that can cause scratches. Use a soft-bristle broom or a vacuum with a soft brush attachment to avoid any potential damage to the surface.


2. Gentle Mopping

Mopping is an effective way to maintain the cleanliness of luxury vinyl flooring. Use a damp mop with a mild, pH-neutral floor cleaner. Avoid excessive water, as standing moisture can seep into seams and edges, potentially causing damage. Wring out the mop thoroughly to ensure it’s only damp, not wet, during the cleaning process.


3. Address Spills Promptly

Accidents happen, and spills are inevitable in a bathroom. However, addressing spills promptly is crucial to preventing staining and potential damage. Use a soft, absorbent cloth or paper towel to blot spills gently. Avoid using abrasive cleaning tools or harsh chemicals, as they can harm the protective top layer of the luxury vinyl.


4. Avoid Harsh Chemicals

When selecting cleaning products, choose those specifically designed for luxury vinyl flooring. Harsh chemicals, abrasive cleaners, and ammonia-based solutions can damage the finish and degrade the quality of the flooring over time. Stick to mild, manufacturer-recommended cleaners to ensure the longevity of your luxury vinyl.


5. Use Furniture Protectors

To prevent scratches and dents, place felt pads or furniture protectors under the legs of chairs, tables, and other heavy furniture. This precautionary measure helps distribute the weight evenly and reduces the risk of indentation, preserving the smooth surface of your luxury vinyl flooring.


6. Proactive Maintenance

Regularly inspect your luxury vinyl flooring for any signs of wear, damage, or loose edges. Addressing issues promptly can prevent further damage and prolong the life of the flooring. If you notice any damaged or heavily worn areas, consider replacing individual tiles or planks rather than waiting for the damage to spread.


7. Avoid Steam Cleaners

While steam cleaners are popular for some types of flooring, they are not recommended for luxury vinyl. The excessive heat and moisture from steam can damage the adhesive and compromise the integrity of the flooring. Stick to the recommended cleaning methods to ensure the longevity of your luxury vinyl in the bathroom.


8. Protect Against Sharp Objects

Be cautious with sharp or abrasive objects that could potentially scratch the surface of your luxury vinyl flooring. Place doormats at entrances to trap dirt and grit from shoes, reducing the risk of scratches. Additionally, avoid dragging heavy or sharp objects across the floor to prevent surface damage.


9. Perform Periodic Deep Cleaning

While regular cleaning is essential, occasional deep cleaning helps maintain the lustre of luxury vinyl flooring. Follow the manufacturer’s recommendations for deep cleaning methods, which may include using specialised floor cleaners or polishes. Always test any new cleaning product in a small, inconspicuous area before applying it to the entire floor.


10. Protect Against Direct Sunlight

Extended exposure to direct sunlight can cause fading or discoloration of luxury vinyl flooring. Consider using blinds or curtains to minimise prolonged exposure, especially in areas with large windows. This precaution helps preserve the vibrant colours and patterns of your flooring over time.


Cost Considerations

Initial Investment

The initial cost of luxury vinyl flooring may vary depending on factors such as the quality of the material and the complexity of the installation. While the upfront investment may be higher than some alternatives, the long-term benefits often outweigh the initial expense.


Long-Term Savings

The durability and longevity of luxury vinyl contribute to long-term savings. Homeowners can enjoy an elegant bathroom flooring solution without the frequent need for repairs or replacements. Considering the cost-effectiveness over time makes luxury vinyl a financially savvy choice.


Comparison with Other Bathroom Flooring Options

Choosing the right flooring for your bathroom involves weighing the pros and cons of various materials. Luxury vinyl flooring stands out as a versatile and practical option, but it’s essential to compare it with other commonly used bathroom flooring materials for a comprehensive understanding:


Luxury Vinyl vs. Ceramic Tiles

  1. Water Resistance:
  • Luxury Vinyl: Known for its waterproof properties, luxury vinyl is highly resistant to water, making it an excellent choice for bathrooms.
  • Ceramic Tiles: While ceramic tiles are water-resistant, the grout lines between tiles can be susceptible to water penetration, requiring periodic maintenance.
  1. Comfort Underfoot:
  • Luxury Vinyl: Offers a warmer and more comfortable feel underfoot, providing a pleasant experience in bathrooms.
  • Ceramic Tiles: Tend to be colder, especially in the winter, and may require rugs or heated flooring to enhance comfort.
  1. Installation and Repairs:
  • Luxury Vinyl: Easier to install, even for DIY enthusiasts, and allows for targeted repairs or replacements of damaged sections.
  • Ceramic Tiles: Installation can be labour-intensive, and repairs often involve removing and replacing entire tiles, potentially leading to higher costs.
  1. Design Options:
  • Luxury Vinyl: Offers a wide range of design options, including realistic wood and stone textures, providing versatility for various design styles.
  • Ceramic Tiles: Come in diverse patterns and colours but may have limitations in replicating the warmth and texture of natural materials.

Luxury Vinyl vs. Natural Stone

  1. Cost:
  • Luxury Vinyl: Generally more budget-friendly, with a range of options to suit different budgets.
  • Natural Stone: Typically comes with a higher price tag due to the cost of materials and installation.
  1. Durability:
  • Luxury Vinyl: Resistant to scratches, stains, and dents, providing durability in high-traffic areas like bathrooms.
  • Natural Stone: While durable, certain types of natural stone may require sealing to prevent stains and damage.
  1. Maintenance:
  • Luxury Vinyl: Low-maintenance, requiring simple cleaning routines to preserve its appearance.
  • Natural Stone: May require specialised cleaning products, and some stones are more susceptible to damage from acidic substances.
  1. Installation:
  • Luxury Vinyl: Easier and quicker to install, with options for DIY projects.
  • Natural Stone: Installation can be labour-intensive, often requiring professional expertise due to the weight and intricacy of the material.

Overall Considerations

  1. Budget-Friendly Options:
  • Luxury Vinyl: Offers a range of budget-friendly options without compromising on quality or aesthetics.
  • Ceramic Tiles and Natural Stone: Can be more expensive, particularly for high-quality or exotic materials.
  1. Maintenance Requirements:
  • Luxury Vinyl: Low-maintenance, requiring simple cleaning routines and occasional deep cleaning.
  • Ceramic Tiles and Natural Stone: May demand more specialised care, with the potential for grout maintenance and specific cleaning products.
  1. Aesthetic Variety:
  • Luxury Vinyl: Provides a broad spectrum of design options, allowing homeowners to achieve various styles.
  • Ceramic Tiles and Natural Stone: Offer unique textures and patterns but may have limitations in replicating certain looks.
  1. Ease of Installation:
  • Luxury Vinyl: Generally easier to install, suitable for both DIY projects and professional installations.
  • Ceramic Tiles and Natural Stone: Often require professional installation due to the intricacies of the process.


While luxury vinyl flooring competes favourably with ceramic tiles and natural stone in many aspects, the choice ultimately depends on individual preferences, budget constraints, and the desired aesthetic. Luxury vinyl stands out as a practical, cost-effective, and visually appealing option for bathrooms, providing a compelling alternative to traditional flooring materials.

In conclusion, when it comes to upgrading your bathroom flooring, luxury vinyl emerges as a versatile and budget-friendly choice. Its waterproof properties, comfort underfoot, and easy maintenance make it an attractive option compared to ceramic tiles and natural stone. If you’re ready to enhance your bathroom with the elegance of luxury vinyl flooring, explore our range of options at The Fitted Carpet Co. For inquiries or assistance, feel free to call us at 01580 753483. Transform your bathroom into a stylish and practical space with the reliability of luxury vinyl – the perfect blend of aesthetics and functionality.

amtico flooring

Amtico Flooring: How to Clean and Maintain Your Investment

Amtico flooring is a popular choice for homeowners, known for its durability, versatility, and aesthetic appeal. Keeping your Amtico floor clean is crucial not only for maintaining its visual charm but also for ensuring its longevity. In this guide, we’ll explore the ins and outs of cleaning Amtico flooring, providing you with expert tips and insights.


Understanding Amtico Flooring

A. What is Amtico Flooring?

Amtico flooring is a premium type of Luxury Vinyl Tile (LVT) that has revolutionised interior design. It combines advanced manufacturing techniques with high-quality materials, resulting in a floor covering that replicates the appearance of natural materials like wood, stone, and ceramics. The meticulous craftsmanship ensures that Amtico captures the authentic textures and patterns of these materials, providing an elegant and realistic aesthetic.


B. Different Types and Styles Available

One of the remarkable features of Amtico flooring is its extensive range of styles, patterns, and colours. Whether you desire the classic warmth of hardwood, the sleekness of marble, or the modern appeal of abstract designs, Amtico offers a myriad of options. The diversity in styles allows homeowners to customise their floors to match their unique tastes and complement their interior design.


C. Aesthetic Appeal and Realism

Amtico has set itself apart by mastering the art of realism. The flooring not only looks like natural materials but also feels like them. The texture is carefully crafted to mimic the grain of wood or the smoothness of stone. This attention to detail contributes to the overall aesthetic appeal, making Amtico flooring a favourite among those who seek the beauty of natural materials without sacrificing durability.


D. Versatility in Application

Whether you are renovating your living room, upgrading the kitchen, or enhancing the elegance of a commercial space, Amtico flooring fits seamlessly into various environments. Its versatility extends to installation methods as well, offering options for glue-down or click-lock installations, catering to different preferences and requirements.


E. Amtico Signature and Spacia Collections

Amtico further refines its offerings through the Signature and Spacia collections. The Signature collection allows for ultimate customisation, enabling you to create bespoke patterns and layouts. On the other hand, the Spacia collection offers a range of pre-designed, ready-to-install options, providing convenience without compromising on style.


F. Durability and Longevity

Beyond its visual appeal, Amtico flooring is known for its durability. Engineered to withstand heavy foot traffic, spills, and daily wear and tear, Amtico floors are a long-term investment in your home. The resilient wear layers protect against scratches, stains, and fading, ensuring that your flooring remains vibrant and beautiful for years to come.


The Importance of Cleaning Amtico Flooring

Amtico flooring, renowned for its durability and aesthetic appeal, demands regular and proper cleaning to maintain its pristine condition. Cleaning is not merely a cosmetic concern; it plays a pivotal role in preserving the lifespan of your Amtico floor and ensuring a healthy living environment.


A. Prolonging the Lifespan

Regular cleaning is a fundamental aspect of Amtico floor care that directly impacts its longevity. The wear layers of Amtico flooring are designed to withstand daily use, but the accumulation of dirt, grit, and debris can gradually degrade these protective layers. By implementing a consistent cleaning routine, you prevent abrasive particles from acting like sandpaper, preserving the integrity of the wear layers and extending the lifespan of your Amtico floor.


B. Maintaining Aesthetic Appeal

The visual allure of Amtico flooring is a significant reason for its popularity. Regular cleaning is essential to uphold its aesthetic appeal. Over time, dirt and stains can mar the surface, dulling the vibrant colours and intricate patterns. By promptly addressing spills, regularly sweeping, and mopping, you not only maintain the visual appeal of your Amtico floor but also ensure that it continues to be a standout feature of your interior design.


C. Health Benefits

Clean flooring contributes to a healthier indoor environment, and Amtico flooring is no exception. The smooth surface of Amtico eliminates hiding places for allergens, dust mites, and other potential irritants. Regular cleaning removes these particles, reducing the risk of respiratory issues and allergies. Amtico’s non-porous surface also makes it resistant to mould and mildew, promoting a hygienic environment for your family or occupants.


D. Prevention of Damage

Amtico flooring, while resilient, can still be susceptible to damage if not properly maintained. Spills, especially those containing harsh chemicals, can lead to staining or deterioration of the floor’s finish. Regular cleaning not only removes potential sources of damage but also allows for the prompt identification of issues. This proactive approach enables you to address problems before they escalate, avoiding costly repairs or the need for premature replacement.


E. Enhanced Slip Resistance

Amtico flooring often features slip-resistant properties, ensuring a safe environment, especially in areas prone to moisture. Regular cleaning is crucial to maintaining this slip resistance. Accumulated grime can compromise the effectiveness of the slip-resistant surface, posing potential safety hazards. By keeping the floor clean, you ensure that the slip-resistant features continue to provide a secure footing for residents and visitors.


Essential Tools and Materials

To maintain the beauty and integrity of your Amtico flooring, it’s crucial to use the right tools and materials for cleaning. Here’s a comprehensive guide to the essential items you’ll need:


A. Gentle Cleaning Solutions

Amtico Floor Cleaner: Use a specifically formulated Amtico floor cleaner or a pH-neutral cleaner recommended by the manufacturer. Avoid harsh chemicals or abrasive cleaners that can damage the protective layers of the flooring.

Homemade Solutions: For a DIY option, mix a few drops of mild dish soap or a gentle floor cleaner with warm water. This solution is effective in removing everyday dirt without compromising the integrity of your Amtico floor.


B. Microfiber Mops and Soft Brushes

Microfiber Mops: Opt for a microfiber mop for regular cleaning. The soft, non-abrasive material effectively captures dirt and prevents scratches on the surface. Microfiber is also highly absorbent, making it suitable for damp mopping without oversaturating the floor.

Soft Brushes: For spot cleaning or addressing stubborn stains, keep a soft-bristle brush on hand. This allows you to gently scrub the affected area without causing damage. Avoid using stiff brushes that may scratch the Amtico surface.


C. Vacuum Cleaner with Soft Brush Attachment

Soft Brush Attachment: If you prefer vacuuming, ensure your vacuum cleaner has a soft brush attachment suitable for hard surfaces. This attachment helps remove loose dirt and prevents scratching.

Adjustable Height Settings: If your vacuum has height adjustment settings, set it to the appropriate level to prevent the vacuum from scratching or damaging the Amtico flooring.


D. Microfiber Cloths or Pads

Microfiber Cloths: Keep microfiber cloths or pads for wiping spills and drying the floor after cleaning. Microfiber is gentle on the surface and leaves a streak-free finish.


E. Bucket or Spray Mop System

Bucket: For traditional mopping, have a bucket available for diluting cleaning solutions and wringing out the mop.

Spray Mop System: Consider a spray mop system with a built-in container for the cleaning solution. This convenient option allows you to spray the cleaner directly onto the floor as you mop.


F. Protective Pads for Furniture

Felt Pads: To prevent scratches and scuffs, attach felt pads to the legs of furniture. These pads create a protective barrier between the furniture and the Amtico flooring.

  1. pH-Neutral Floor Cleaner for Intensive Cleaning

Specialised Cleaners: Periodically, use specialised Amtico intensive cleaners recommended by the manufacturer. These cleaners are designed for deep cleaning without compromising the floor’s finish.


By using these essential tools and materials, you can ensure that your Amtico flooring receives the care it deserves, maintaining its beauty and durability for years to come. Remember to follow the manufacturer’s guidelines for cleaning products to avoid any potential damage.


Step-by-Step Cleaning Guide

Maintaining your Amtico flooring involves a systematic cleaning routine to ensure its longevity and aesthetic appeal. Follow this step-by-step guide to keep your Amtico floor in pristine condition:


A. Sweeping and Dusting

Remove Loose Dirt: Begin by sweeping or using a vacuum cleaner with a soft brush attachment to remove loose dirt, dust, and debris from the surface. Pay special attention to corners and edges where dirt tends to accumulate.

Use Soft Bristles: If using a broom, choose one with soft bristles to avoid scratching the Amtico flooring. For vacuuming, ensure the machine is set to the appropriate height for hard surfaces.


B. Proper Mopping Techniques

Damp Mopping: Prepare a cleaning solution by diluting Amtico floor cleaner or a mild detergent with warm water. Dampen a microfiber mop or a spray mop system with the solution, ensuring it is not overly wet.

Even Strokes: Mop the floor using even, controlled strokes. Avoid excess water on the floor, as prolonged exposure to moisture can damage the Amtico surface. Wring out the mop or change the mop head as needed to maintain cleanliness.

Focus on Stains: For stubborn stains or spills, gently scrub the affected area with a soft-bristle brush using the cleaning solution. Be cautious not to apply excessive pressure, which may harm the flooring.


C. Addressing Stains and Spills

Prompt Cleanup: Attend to spills immediately to prevent staining. Blot liquids with a microfiber cloth, and use a damp cloth for sticky substances. Avoid using excessive water, and dry the area promptly to prevent water damage.

Homemade Stain Removers: For common stains like red wine or ink, create a gentle homemade stain remover using a mixture of baking soda and water. Apply the paste to the stain, let it sit for a few minutes, and then wipe it away with a damp cloth.


D. Regular Inspection

Check for Damage: Periodically inspect the Amtico flooring for any signs of damage, scratches, or wear. Address any issues promptly to prevent further deterioration.

Adjust Furniture Pads: Ensure that felt pads on furniture legs are intact and replace them if necessary. This prevents scratches and marks caused by furniture movement.


By following this step-by-step cleaning guide, you not only ensure the cleanliness of your Amtico flooring but also contribute to its long-term durability and visual appeal. Regular maintenance is the key to enjoying the timeless beauty of your Amtico floor for years to come.


Dos and Don’ts of Amtico Flooring Cleaning

Proper cleaning practices are essential to maintain the integrity and appearance of your Amtico flooring. Follow these dos and don’ts to ensure effective cleaning without compromising the quality of your floor:


A. Dos


  • Use Mild Cleaners: Opt for mild, pH-neutral cleaners specifically designed for vinyl or Amtico flooring. Harsh chemicals and abrasive cleaners can damage the protective layers of the floor, leading to premature wear.


  • Clean Spills Promptly: Attend to spills and stains immediately. The longer they linger, the harder they may be to remove. Prompt cleaning helps prevent permanent damage to the flooring.


  • Damp Mop Regularly: Incorporate regular damp mopping into your cleaning routine. A damp microfiber mop or a spray mop system is ideal for maintaining the cleanliness of your Amtico floor without excess moisture.


  • Use Soft Bristle Brushes: When dealing with stubborn stains, use a soft-bristle brush to avoid scratching the surface. Gentle scrubbing with a soft brush, coupled with a mild cleaning solution, can effectively address stains without causing damage.


  • Follow Manufacturer Guidelines: Adhere to the manufacturer’s guidelines for cleaning products and methods. This ensures that you are using products compatible with Amtico flooring and won’t void the warranty.


B. Don’ts


  • Avoid Harsh Chemicals: Steer clear of harsh chemicals, bleach, and ammonia-based cleaners. These substances can erode the protective layers of Amtico flooring, leading to discoloration and loss of sheen.


  • Say No to Steam Cleaners: Avoid using steam cleaners on Amtico flooring. The high temperature and moisture can damage the adhesive and cause the floor to lift or warp. Stick to gentle cleaning methods to protect your investment.


  • Limit Water Exposure: Excessive moisture is detrimental to Amtico flooring. Avoid using a soaking wet mop, and promptly wipe away any water spills. Prolonged exposure to water can cause swelling or damage to the edges of the flooring.


  • Skip Waxing and Polishing Too Often: While periodic polishing and buffing can restore shine, excessive waxing or polishing can lead to a buildup that attracts dirt and dulls the floor. Follow a sensible schedule for polishing based on the manufacturer’s recommendations.


  • Refrain from Using Vinegar: Despite its popularity as a household cleaner, vinegar is not suitable for Amtico flooring. The acidity in vinegar can damage the floor’s finish and compromise its longevity.


Tips for Stubborn Stains

Dealing with stubborn stains on your Amtico flooring may require a bit more effort, but with the right approach, you can restore your floor’s pristine condition. Here are some effective tips for tackling those persistent stains:


A. Dealing with Common Stains

Ink Stains:


Tip: Blot the stain with a clean, dry cloth as soon as possible. Create a paste using baking soda and water, gently rub it onto the stain, and then wipe away with a damp cloth.


Red Wine Stains:


Tip: Quickly blot the stain with a paper towel or cloth. Mix a small amount of dish soap with water and dab the stain. Rinse with clean water and dry thoroughly.


Grease or Oil Stains:


Tip: Sprinkle baking soda or cornstarch over the stain to absorb excess grease. After a few minutes, wipe it away with a damp cloth. Follow up with a mild cleaning solution.


Scuff Marks:


Tip: Gently rub the scuff mark with a white eraser or a soft cloth dampened with a mild cleaning solution. Avoid using abrasive materials that may scratch the surface.


B. Homemade Stain Removers

Baking Soda Paste:


Tip: Create a paste using baking soda and water. Apply the paste to the stain, let it sit for a few minutes, and then gently scrub with a soft-bristle brush. Wipe away with a damp cloth.


Vinegar and Water Solution:


Tip: Mix equal parts of water and white vinegar. Dampen a cloth with the solution and gently rub the stain. Rinse with clean water and dry thoroughly.


Hydrogen Peroxide for Tough Stains:


Tip: For more stubborn stains, mix hydrogen peroxide with water (follow manufacturer instructions). Apply the solution to the stain, let it sit briefly, and then wipe away with a damp cloth.


C. Prevention Tips for Stubborn Stains

Area Rugs and Mats:


Tip: Place area rugs or mats in high-traffic areas, especially in places prone to spills or stains. This provides an extra layer of protection for your Amtico flooring.


Regular Maintenance:


Tip: Stay consistent with your regular cleaning routine to prevent stains from becoming deeply embedded. Promptly address spills and stains as soon as they occur.


Use Protective Pads:


Tip: Place felt or fabric pads on the bottom of furniture legs to prevent scratches and scuffs. Regularly check and replace these pads to maintain their effectiveness.


Regular Maintenance Routine

Establishing a consistent and effective maintenance routine is key to preserving the beauty and longevity of your Amtico flooring. Follow these guidelines for a regular maintenance routine that will keep your floors looking impeccable:


A. Weekly Cleaning Schedule

Sweep or Vacuum Regularly:


Tip: Start the week by sweeping or vacuuming your Amtico flooring to remove loose dirt and debris. Use a soft-bristle brush attachment on your vacuum to prevent scratching.


Damp Mopping:


Tip: Damp mop the entire floor using a microfiber mop and a mild cleaning solution. Ensure the mop is wrung out thoroughly to avoid excessive moisture on the floor. Pay attention to high-traffic areas and spots prone to spills.


Spot Cleaning:


Tip: As you clean, address any spots or spills promptly. Use the appropriate cleaning solution for the type of stain, and gently blot or wipe the affected area.


B. Preventive Measures

Furniture Pads:


Tip: Regularly check and ensure that furniture pads on the legs of chairs, tables, and other furniture items are intact. Replace any worn-out pads to prevent scratches and indentations.


Use Walk-off Mats:


Tip: Place walk-off mats at entry points to capture dirt and moisture from shoes before it reaches the Amtico flooring. Clean or replace these mats regularly to maintain their effectiveness.


Rotate Area Rugs:


Tip: If you use area rugs on your Amtico flooring, periodically rotate them to ensure even wear. This prevents any potential discoloration or uneven fading under the rugs.


C. Preventing Scratches

Remove Shoes Indoors:


Tip: Encourage family members and guests to remove their shoes when entering the house. This simple practice reduces the risk of abrasive particles causing scratches on the Amtico surface.


Use Soft Casters:


Tip: If you have furniture with casters, ensure they are soft and suitable for hard surfaces. Hard casters can scratch and damage Amtico flooring over time.


D. Periodic Deep Cleaning

Monthly Intensive Cleaning:


Tip: Once a month, perform a more intensive cleaning session using specialised Amtico intensive cleaners or a mild solution. This helps remove any accumulated grime and maintains the floor’s overall cleanliness.


Inspect for Damage:


Tip: During monthly cleaning, inspect the Amtico flooring for any signs of damage, scratches, or wear. Address any issues promptly to prevent further deterioration.

By incorporating these practices into your regular maintenance routine, you’ll ensure that your Amtico flooring remains not only clean but also in top condition. Consistent care and preventive measures are the foundation for enjoying the enduring beauty of your investment.


In conclusion, maintaining your Amtico flooring involves a combination of regular care, preventive measures, and addressing issues promptly. By following the outlined cleaning routine, you can enjoy the timeless beauty of your Amtico floor while ensuring its durability for years to come.


Remember to adhere to the dos and don’ts, implement preventive measures, and incorporate effective cleaning techniques for both regular and intensive maintenance. Amtico flooring is an investment in style and longevity, and with the right care, it will continue to enhance the ambiance of your home or business.


For more information on Amtico flooring options or professional assistance with installation and maintenance, visit The Fitted Carpet Co. or give us a call at 01580 753483. Our experts can provide tailored advice to ensure your Amtico flooring remains in optimal condition, reflecting the elegance and sophistication it was designed to bring to your space.


Remember, a well-maintained Amtico floor not only adds value to your property but also contributes to a welcoming and aesthetically pleasing environment. Invest in the longevity of your flooring, and enjoy the enduring charm it brings to your home.

carpet color trends

Harmony Underfoot: Exploring the Top Carpet Color Trends

Selecting the right carpet is a significant step in transforming your living spaces, offering a blend of style, comfort, and contemporary aesthetics. In the dynamic field of interior design, staying informed about the latest carpet color trends is crucial. In this blog, we’ll navigate the diverse world of flooring. Let’s unravel the intricacies of design, appreciate the timeless allure of neutral tones, and delve into the bold expressions of monochromatic marvels. From the opulence of metallic touches to the serene charm of muted pastels, this guide is your companion in understanding the ever-evolving landscape of carpet color trends.

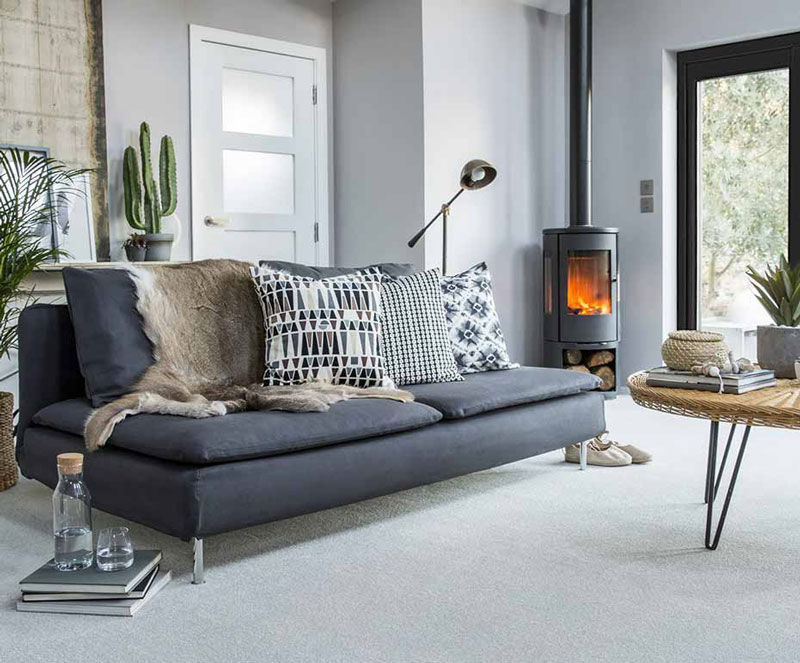
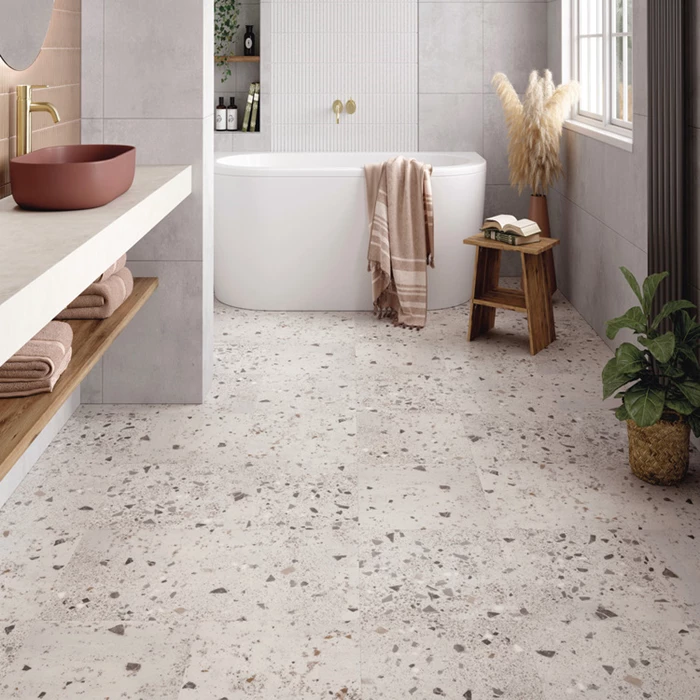
Neutral Elegance: The Timeless Allure of Beige and Gray


Neutral tones, particularly beige and grey, have long been heralded as the epitome of timeless elegance in carpet design. The enduring allure of these colours lies in their ability to seamlessly integrate with various interior styles while providing a versatile canvas for design expression.


1. Versatility Across Design Styles:


Transcending Trends: Beige and grey carpets have the remarkable ability to transcend passing design trends. Their neutrality allows them to complement a wide range of decor styles, from classic and traditional to modern and minimalist.

Flexibility in Design: Whether you prefer a cosy, rustic aesthetic or a sleek, contemporary look, beige and grey carpets act as a neutral foundation that adapts to the evolving design preferences of your home.


2. Creating a Calm and Airy Atmosphere:


Natural Light Enhancement: Beige and grey hues possess the inherent quality of enhancing natural light in a room. This makes them particularly ideal for spaces with ample sunlight, contributing to an open and airy ambiance.

Expanding Space Perception: The light-reflective nature of these neutral colours imparts a sense of expansiveness, making rooms feel larger and more inviting.


3. Accentuating Texture and Pattern:


Embracing Texture: Beige and grey carpets serve as a perfect backdrop for showcasing texture within the carpet itself or in other elements of your decor. From plush textures to intricate patterns, neutral tones allow these features to shine.

Playing with Patterns: The understated elegance of beige and grey provides an excellent foundation for experimenting with patterns. Whether it’s a subtle geometric motif or a more elaborate design, these colours provide a sophisticated canvas for patterned carpets.


4. Timeless Appeal in Stain Resistance:


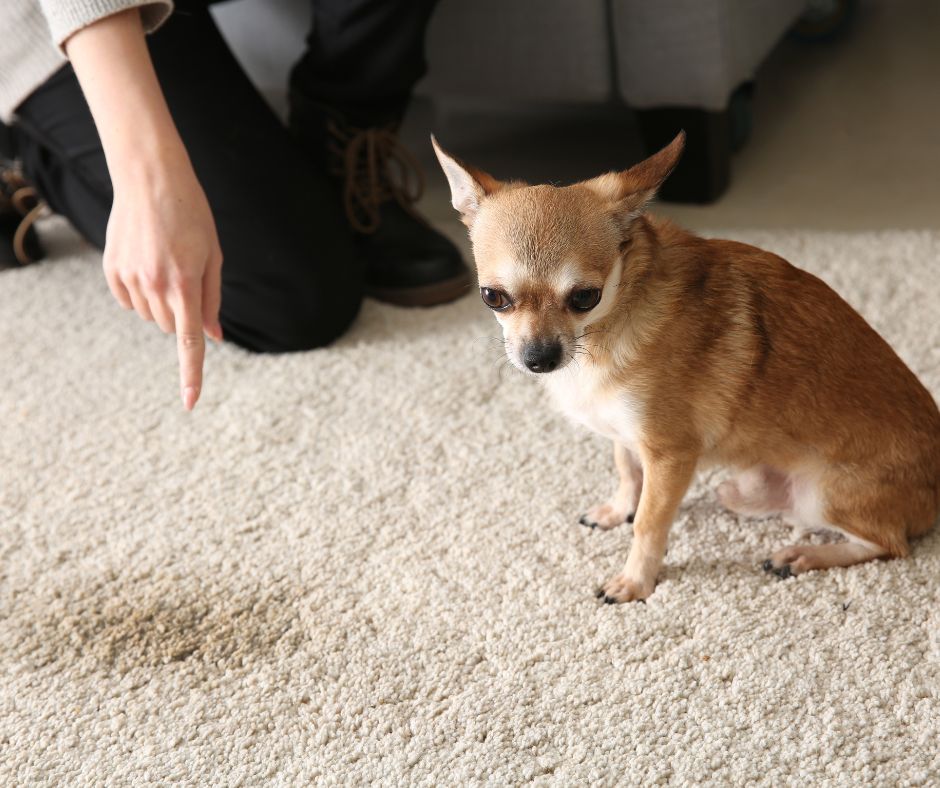
Practicality and Concealment: Beige and grey carpets, with their natural ability to hide dirt and stains effectively, offer a practical solution for households with high traffic or families with children and pets.

Easy Maintenance: The forgiving nature of neutral tones simplifies maintenance, allowing homeowners to enjoy the plush comfort of their carpets without constant worry about visible wear and tear.


5. Design Flexibility with Accent Colors:


Pops of Colour: Beige and grey serve as a neutral foundation that encourages the incorporation of accent colours. Adding vibrant accessories, colourful furniture, or bold artworks can infuse personality into your space without clashing with the carpet.

Seasonal Transformations: The neutrality of beige and grey allows for easy and cost-effective seasonal transformations. Swap out accent pieces to create fresh looks throughout the year while maintaining the timeless base of your carpet.


In essence, the timeless allure of beige and grey carpets lies in their adaptability, sophistication, and ability to stand the test of time. As you consider flooring options for your home, the enduring elegance of neutral tones opens the door to a world of design possibilities that can evolve with your changing tastes and preferences.


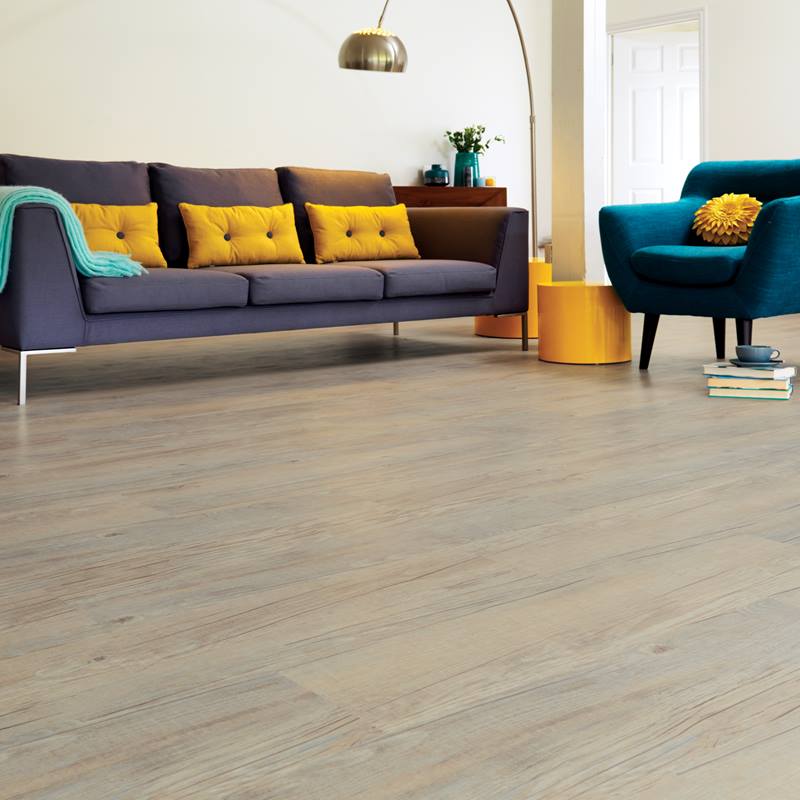
Bold Blues and Greens: Injecting Vibrancy into Your Space


In the realm of carpet color trends, a notable resurgence is observed in the embrace of bold blues and greens, bringing a refreshing burst of vibrancy into contemporary interior designs. These captivating hues not only add depth and personality to a space but also provide a canvas for creative expression. Let’s delve into this trend, exploring the reasons behind its popularity and offering practical tips on how to incorporate these vibrant colours without overwhelming your decor.


1. The Resurgence of Bold Blues and Greens:


Expressive Freedom: As interior design trends evolve, there’s a growing appreciation for self-expression and individuality. Bold blues and greens offer a departure from traditional neutral tones, providing homeowners with the opportunity to infuse their living spaces with energy and character.

Connection to Nature: Inspired by nature, these colours evoke the calming essence of the sky and the lushness of foliage. Incorporating elements from the natural world into interior design fosters a sense of tranquillity and harmony within the home.


2. Tips for Incorporating Vibrant Hues:


Accent Pieces and Accessories: One of the most effective ways to introduce bold blues and greens is through accent pieces and accessories. Consider vibrant throw pillows, rugs, or artwork that feature these hues, allowing for a pop of colour without committing to a fully coloured carpet.

Feature Wall or Rug: Opt for a bold blue or green feature wall or area rug to serve as a focal point in the room. This approach creates visual interest without saturating the entire space with vibrant colours.

Gradual Transition: If you’re drawn to the idea of a bold blue or green carpet but are cautious about overwhelming the space, consider a gradual transition. Start with smaller elements like cushions or decor items in these hues, then gradually introduce the colour through a statement carpet.

Complimentary Neutrals: Balance the intensity of bold blues and greens by incorporating complementary neutral tones. Whites, greys, and earthy hues provide a harmonious backdrop, allowing the vibrant colours to shine without dominating the overall aesthetic.

Texture and Pattern Play: Introduce visual interest by opting for textured or patterned carpets in bold blues and greens. Patterns can break up the solid colour, adding depth and dimension to the flooring.

Natural Light Considerations: Bold colours can be enhanced or subdued based on natural light levels in the room. Consider how sunlight interacts with the hues throughout the day, and adjust the intensity accordingly.


3. Embracing Individual Style:


Personal Expression: Bold blues and greens empower homeowners to embrace their individual style and make a bold statement with their interior design choices. Experimenting with vibrant colours can result in a space that reflects personality and creativity.

Seasonal Transformations: These bold hues lend themselves well to seasonal transformations. Swap out decor items or accessories in different shades to create varied looks throughout the year, allowing for dynamic and evolving spaces.


By exploring the resurgence of bold blues and greens in carpet colour trends and implementing these practical tips, you can confidently infuse your space with vibrant energy while maintaining a balanced and visually appealing decor. Whether you choose to make a statement with a bold carpet or subtly incorporate these hues through accessories, the key is to find the perfect balance that resonates with your personal style and enhances the overall ambiance of your home.


Earthy Tones: Connecting with Nature in Interior Design


There’s a profound shift towards embracing the beauty of nature within our living spaces. Earthy tones, inspired by the rich and grounding hues found in the natural world, have become a hallmark of this movement. Let’s explore the essence of earthy tones in interior design and discover how they create a harmonious connection with nature.


1. The Essence of Earthy Tones:


Inspiration from Nature: Earthy tones draw inspiration from the diverse palette found in nature, encompassing warm browns, soothing greens, serene blues, and muted greys. These colours evoke a sense of tranquillity, connecting us to the outdoors and creating a serene and inviting atmosphere within our homes.

Grounding Effect: Earthy tones are inherently grounding, bringing a sense of stability and balance to a space. This grounding effect is particularly valuable in today’s fast-paced world, offering a retreat within our homes that echoes the calming qualities of the natural environment.


2. Incorporating Earthy Tones into Interior Design:


Natural Materials: Integrate natural materials into your design, such as wooden furniture, stone surfaces, or woven textiles. These elements not only complement earthy tones but also reinforce the connection to nature within your home.

Warmth with Wood: Opt for wooden flooring or furniture in warm, natural finishes. The organic grain and warmth of wood enhance the overall earthy aesthetic, infusing the space with a comforting and timeless feel.

Soothing Greens: Incorporate calming greens, reminiscent of lush foliage, through elements like indoor plants, accent walls, or upholstery. This adds a refreshing touch and enhances the overall biophilic design—bringing the outdoors inside.

Earthy Textures: Choose textiles and fabrics with earthy textures, such as jute, linen, or wool. These materials not only enhance the tactile experience but also contribute to the visual depth of the space.

Subtle Blues and Grays: Infuse subtle blues and greys inspired by the sky and mountains to create a sense of expansiveness and serenity. These tones work well as wall colours, accent pieces, or even in the selection of a calming carpet.


3. Creating a Biophilic Connection:


Bringing the Outdoors In: Earthy tones form a fundamental part of the biophilic design philosophy, which seeks to incorporate natural elements into interior spaces. Large windows, open layouts, and natural light enhance the biophilic connection, making the home a reflection of the surrounding environment.

Seasonal Transitions: Earthy tones offer the flexibility to adapt to changing seasons. Consider incorporating accent pieces or decor items in varying earthy hues to mirror the shifting colours of nature throughout the year.


4. Wellness and Tranquility:


Holistic Well-being: The use of earthy tones aligns with the growing emphasis on holistic well-being in interior design. These colours create a nurturing environment that supports relaxation, mindfulness, and a sense of sanctuary within the home.

Balancing Energy: Earthy tones strike a delicate balance between energising and calming, promoting a soothing atmosphere. This equilibrium is conducive to stress reduction and overall mental well-being.


In essence, embracing earthy tones in interior design transcends mere aesthetic choices; it becomes a conscious decision to foster a deeper connection with the natural world. Whether through warm browns, calming greens, or serene blues, the incorporation of earthy tones invites a sense of tranquillity, grounding, and well-being into our homes—a testament to the enduring beauty found in the simplicity of nature.


Blushing Beauties: The Rise of Rosy Carpet Tones


There has been a noticeable rise in the popularity of blush and rose-inspired carpet colours, bringing a touch of romance and sophistication to modern homes. These soft and elegant hues have captivated homeowners and designers alike, introducing a subtle yet impactful element to interior spaces. Let’s delve into the reasons behind the growing appeal of blush tones and explore creative ways to incorporate these rosy beauties into various rooms.


1. The Allure of Blush Tones:


Timeless Elegance: Blush tones, reminiscent of delicate roses and soft petals, exude timeless elegance. Their subtle and sophisticated nature adds a touch of refinement to any room, creating an atmosphere of grace and charm.

Versatility in Design: Blush tones are incredibly versatile, effortlessly complementing various design styles. Whether incorporated into contemporary, vintage, or eclectic interiors, these hues bring a sense of warmth and delicacy that transcends design boundaries.


2. Incorporating Blush Tones into Various Rooms:


Blush as a Neutral Base: Consider using blush as a neutral base for larger carpeted areas. This allows for flexibility in styling, as blush can seamlessly blend with a wide range of accent colours and textures.

Bedroom Serenity: Infuse a sense of serenity and romance into the bedroom by opting for a blush-toned carpet. This soft and inviting hue creates a tranquil atmosphere, enhancing the overall cosiness of the space.

Accent Pieces in Living Areas: If a fully blush carpet feels too bold, incorporate these tones through smaller accent pieces, such as area rugs or carpet runners in the living room. This approach adds a hint of romance without overpowering the room.

Subtle Entryway Impact: Make a lasting first impression by introducing blush tones in the entryway. A blush-coloured carpet or a welcoming blush-toned runner sets a graceful tone as you step into the home.

Children’s Rooms with a Twist: Embrace the trend in children’s rooms by incorporating blush-coloured carpets. This twist on traditional pastels adds a touch of sophistication to nursery or playroom designs.


3. Pairing Blush Tones with Complementary Colours:


Elegant Neutrals: Create an elegant and refined look by pairing blush tones with neutral colours like white, beige, or soft greys. This combination enhances the sophistication of the space while allowing the blush hues to shine.

Metallic Accents: Elevate the glamour by incorporating metallic accents alongside blush tones. Gold or rose gold elements add a touch of luxury, creating a sophisticated and visually appealing composition.

Contrasting Deep Colours: For a bolder approach, pair blush with deeper colours like navy blue or charcoal grey. This contrast creates a striking visual impact, balancing the softness of blush with deeper, more dramatic tones.


4. Enhancing Natural Light:


Light-Reflective Qualities: Blush tones possess light-reflective qualities that enhance natural light in a room. Consider this advantage when choosing blush-coloured carpets for spaces with ample sunlight, creating a bright and airy atmosphere.

Small Spaces and Blush: In smaller rooms or areas with limited natural light, blush tones can work wonders to create the illusion of space and openness. The soft colour adds a gentle brightness to confined areas.


Incorporating blush and rose-inspired carpet colours into your home design allows for the infusion of subtle romance and sophistication. Whether utilised as a neutral base or introduced through smaller accent pieces, blush tones bring a timeless and graceful quality to interior spaces, transforming them into serene retreats with a touch of rosy allure.


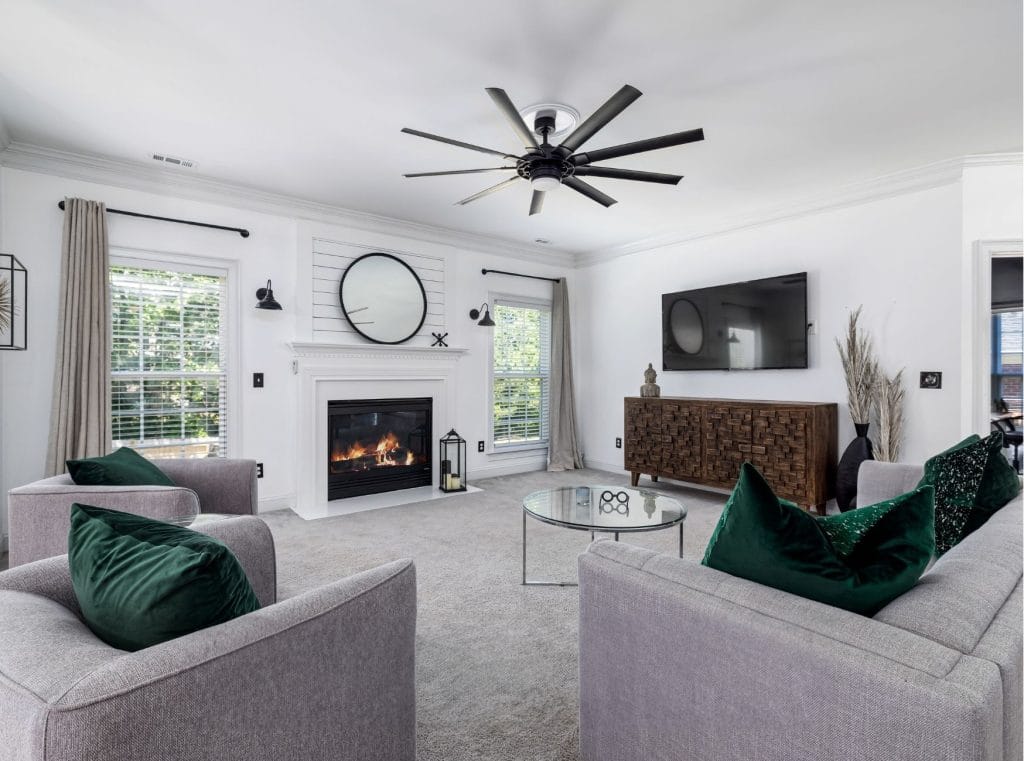
Monochromatic Marvels: The Chic Simplicity of Black and White


The timeless elegance of monochromatic color schemes, particularly black and white, continues to captivate homeowners and designers alike. The chic simplicity of black and white tones transcends trends, creating a sophisticated and versatile foundation for a myriad of design styles. Let’s delve into the enduring allure of monochromatic marvels and explore how the chic simplicity of black and white can elevate various spaces within your home.


1. Enduring Timelessness:


Classic Contrast: The combination of black and white is a classic contrast that has stood the test of time. This enduring duo provides a visually striking and sophisticated palette that remains eternally fashionable, regardless of changing design trends.

Versatility in Design Styles: One of the defining features of black and white is its adaptability to diverse design styles. From minimalist and modern aesthetics to vintage and traditional themes, the simplicity of these tones effortlessly complements various interior design approaches.


2. Incorporating Black and White into Various Spaces:


Dramatic Entryways: Make a bold statement in your entryway by opting for black and white flooring or a captivating black and white rug. This sets a stylish tone and welcomes guests with a touch of dramatic flair.

Timeless Kitchens: Black and white kitchens exude sophistication and timelessness. Consider sleek black countertops against white cabinetry or vice versa, creating a clean and contemporary culinary space.

Elegance in Bedrooms: Foster a serene and elegant atmosphere in bedrooms with black and white bedding, furniture, or accent pieces. This colour scheme offers a neutral yet impactful backdrop for restful spaces.

Modern Bathrooms: Transform your bathroom into a modern oasis with black and white tiles, fixtures, or accessories. The crisp contrast adds a sense of cleanliness and sophistication to the space.


3. Balancing Elements in Monochromatic Design:


Textures and Patterns: To prevent a monochromatic space from feeling flat, introduce a variety of textures and patterns. In a black and white design, consider textured throws, patterned pillows, or geometric rugs to add depth and visual interest.

Accent Colors for Emphasis: While the focus is on black and white, strategically incorporate accent colours to emphasise specific elements. This could be a pop of red in decorative accessories or a touch of gold in hardware and fixtures for added glamour.

Play with Scale: Experiment with different scales of black and white elements. Large black furniture pieces against a predominantly white background can create a bold focal point, while smaller black and white patterns add intricacy and detail.


4. Artistic Expression:


Black and White Artwork: Integrate black and white artwork to introduce a sense of artistic expression. Photography, abstract paintings, or graphic prints in these tones can serve as captivating focal points in any room.

Gallery Walls: Create a sophisticated gallery wall using black and white frames to showcase a collection of artwork or photographs. This arrangement adds a personal touch and visual interest to walls.

Statement Furniture: Make a statement with black and white furniture pieces. A bold black sofa against white walls or a white dining set paired with black chairs can elevate the overall aesthetic of the room.


5. Maximising Light and Space:


Light Reflectivity: The contrast between black and white enhances the reflectivity of natural and artificial light. This quality brightens up spaces, making them feel larger, airier, and more inviting.

Illusion of Space: The combination of black and white is known for creating the illusion of space. This is particularly effective in smaller rooms, where the contrast between light and dark tones visually expands the area.


In summary, the chic simplicity of black and white is an enduring design choice that continues to captivate for its timeless elegance and adaptability. Whether applied as a dominant colour scheme or as accent elements, the versatility of black and white tones allows for endless creativity in crafting sophisticated and visually impactful interiors.


Muted Pastels: Soft Hues for a Serene Atmosphere


In the realm of interior design, muted pastels have emerged as a favoured choice for those seeking a serene and tranquil atmosphere within their living spaces. Colours like lavender, powder blue, and soft pink bring a subtle, soothing elegance that promotes a sense of calmness and relaxation. Let’s explore the calming effect of muted pastels and discuss effective strategies for balancing these gentle tones to create a serene and inviting living space.


1. The Calming Effect of Muted Pastels:


Soft and Subdued Tones: Muted pastels are characterised by their soft, understated tones that evoke a sense of calmness. Lavender, powder blue, and soft pink, among others, contribute to a tranquil ambiance, creating a space that feels gentle and inviting.

Natural Inspiration: Drawing inspiration from nature, muted pastels reflect the serene hues found in elements such as blooming flowers, clear skies, and gentle sunsets. This connection to the natural world enhances the overall calming effect within the home.


2. Balancing Muted Pastels for Tranquil Living:


Neutral Foundations: Establish a neutral foundation to anchor the room before introducing muted pastels. Whites, creams, or light greys serve as excellent base colours, providing a clean canvas for the subtle beauty of pastels to unfold.

Layering with Textures: Introduce textures to add depth and interest to the space. Consider incorporating soft textures like plush throws, textured rugs, or linen curtains in muted pastel shades. This layering effect enhances the tactile experience and contributes to the overall sense of tranquillity.

Accent Wall or Statement Piece: Create a focal point by incorporating a muted pastel accent wall or a statement piece of furniture in one of these calming hues. This strategic use of color draws the eye and sets the tone for a peaceful environment without overwhelming the entire space.

Harmonious Colour Palette: Develop a harmonious colour palette by selecting muted pastels that complement each other. For example, pair soft pink with powder blue or lavender with muted mint. This approach ensures a cohesive and visually pleasing composition.

Subtle Contrasts: Introduce subtle contrasts within the muted pastel palette. Consider combining lighter and darker shades of the same hue to add depth while maintaining the overall softness of the colour scheme.

Natural and Artificial Lighting: Capitalise on natural light to enhance the calming effect of muted pastels. Sheer curtains or light-filtering window treatments allow soft sunlight to permeate the space, creating a gentle and ethereal atmosphere. Additionally, consider incorporating warm artificial lighting to maintain a cosy ambiance during the evening.


3. Selecting Muted Pastels for Different Spaces:


Bedroom Serenity: Muted pastels are particularly well-suited for bedrooms, creating a serene and calming retreat. Soft pink or lavender bedding, combined with neutral furniture and soothing lighting, fosters a restful environment.

Tranquil Living Rooms: In living spaces, consider incorporating muted pastels through accent pillows, throws, or artwork. This approach allows for flexibility, enabling you to update the colour scheme easily if desired.

Inviting Dining Areas: Infuse muted pastels into dining areas through soft-coloured table linens, dinnerware, or upholstered dining chairs. This adds a touch of elegance and creates a welcoming atmosphere for shared meals.

Relaxing Bathrooms: Transform bathrooms into serene sanctuaries by incorporating muted pastel towels, shower curtains, or wall colours. The softness of these hues enhances the spa-like ambiance, promoting relaxation and tranquillity.


By embracing muted pastels in your interior design, you can create a space that exudes a gentle and calming atmosphere. Whether incorporated as the dominant colour scheme or in subtle accents, muted pastels provide a versatile and timeless approach to cultivating tranquillity within your home.


Metallic Touches: Shimmering Golds and Silvers in Carpets


In the realm of interior design, the infusion of metallic elements has become a trend that exudes opulence and sophistication. Shimmering golds and silvers, in particular, bring a touch of glamour to carpets, elevating the overall aesthetic of a space. Let’s explore the allure of metallic touches in carpets and delve into strategies for incorporating these luxurious tones into various areas of your home.


1. The Allure of Metallic Elements:


Luxurious Aesthetic: Shimmering golds and silvers in carpets contribute to an air of luxury and refinement. These metallic tones catch and reflect light, adding a captivating sparkle that instantly transforms the ambiance of a room.

Timeless Elegance: The use of metallic elements in interior design has a timeless quality. Gold and silver have been associated with opulence throughout history, and incorporating these tones into carpets provides a sense of enduring elegance.


2. Incorporating Shimmering Golds and Silvers:


Statement Carpets: Consider selecting carpets with bold metallic patterns or woven accents in gold or silver. A statement carpet becomes a focal point, instantly drawing attention and infusing the space with a luxurious feel.

Neutral Backgrounds: Pair metallic carpets with neutral backgrounds to allow the gold or silver tones to stand out. Beige, grey, or cream-coloured walls and furniture provide a sophisticated canvas, allowing the metallic elements to shine.

Subtle Metallic Threads: For a more understated approach, opt for carpets with subtle metallic threads woven into the fabric. This adds a touch of glamour without overwhelming the space, making it suitable for various design styles.

Layering with Other Textures: Combine metallic carpets with other textures to create a rich and inviting atmosphere. Plush furniture, velvet cushions, or silk curtains complement the shimmering quality of golds and silvers, adding depth to the overall design.


3. Strategies for Different Spaces:


Living Room Opulence: In the living room, a metallic carpet can anchor the seating area, serving as a luxurious foundation for the space. Complement it with metallic accents in decor, such as gold or silver framed mirrors, vases, or table lamps.

Bedroom Glamour: Infuse a sense of glamour into the bedroom by selecting a metallic carpet with a plush texture. This creates a sumptuous underfoot experience, enhancing the overall luxuriousness of the room.

Dining Area Sophistication: Elevate the dining area with a metallic carpet under the dining table. This not only adds a touch of sophistication but also delineates the dining space within an open-concept layout.

Hallway Elegance: Make a grand entrance by extending the metallic touch into hallways. A runner with gold or silver accents creates a visually stunning pathway, setting an elegant tone as you move through the home.


4. Balancing Metallics with Other Colours:


Monochromatic Elegance: Create a sense of monochromatic elegance by pairing gold or silver carpets with similar-toned decor elements. This creates a cohesive and visually pleasing look that exudes sophistication.

Complementary Colours: Consider using metallic carpets in spaces with complementary colours. Gold pairs well with warm tones like deep reds or navy blues, while silver complements cool tones like shades of grey or icy blues.

Neutral Foundations: Start with a neutral colour palette as a foundation and introduce metallic elements as accents. This ensures a balanced and harmonious look, allowing the gold or silver tones to add a touch of glamour without dominating the colour scheme.


5. Maintaining Versatility:


Seasonal Transformations: The versatility of metallic carpets allows for seasonal transformations. Switch out decor elements or accessories to introduce different accent colors, giving the space a fresh look throughout the year.

Mixing Metals: Embrace the trend of mixing metallics by incorporating both gold and silver elements into the design. This adds depth and complexity, creating an eclectic and modern aesthetic.

Consider the Scale: When selecting metallic carpets, consider the scale of the space. In larger rooms, a more expansive metallic design may work well, while smaller spaces might benefit from subtle hints of gold or silver.


By incorporating shimmering golds and silvers into your carpets, you bring a touch of luxury and sophistication to your home. Whether used as a bold statement or in more subtle accents, these metallic touches add a layer of opulence that transcends trends, creating a timeless and glamorous ambiance within your living spaces.


In the world of interior design, the choice of carpets plays a pivotal role in shaping the ambiance of your living spaces. From the timeless allure of neutral elegance to the bold statement of monochromatic marvels, each colour and design choice contributes to the narrative of your home. Whether you seek the luxurious touch of metallic elements or the calming embrace of muted pastels, our collection of fitted carpets is curated to inspire and elevate your living experience.


At The Fitted Carpet Co., we understand the importance of finding the perfect carpet that not only complements your style but also enhances the functionality of your space. Our commitment to quality, style, and personalised service sets us apart. We invite you to explore our website to discover a diverse range of fitted carpets that cater to every taste and preference.


Contact us today if you want to transform your living spaces with fitted carpets that blend comfort, style, and functionality seamlessly. Our team is dedicated to assisting you in finding the ideal flooring solution that aligns with your vision for a home that reflects your unique personality and lifestyle.


Visit our website to browse our collection, gain valuable insights from our experts, and embark on a journey of redefining your living spaces with the elegance and comfort of fitted carpets. Your home deserves the finest, and we are here to help you achieve that.

plush carpet

Plush Perfection: How to Choose the Best Plush Carpet for Your Home

Choosing the ideal carpet is more than a simple decision—it’s an artful process of creating an environment that encapsulates comfort, style, and a touch of luxury. In the pursuit of plush perfection, our focus shifts to finding the best plush carpet for your home. This blog serves as your practical guide, leading you through the world of luxurious fibres, exploring the significance of pile height, and unravelling the secrets to selecting the perfect hue that harmonises with your living space. 

Understanding Plush Carpet Construction: Fibre Types and Pile Height


When choosing the perfect plush carpet, a fundamental aspect to comprehend is the intricate construction that contributes to its luxurious feel and appearance. Two key elements that significantly influence plush carpet performance are fibre types and pile height.


Exploring Plush Carpet Fibre Types:


Plush carpets can be crafted from various fibres, each offering unique characteristics that contribute to the overall look, feel, and durability of the carpet. Here’s a breakdown of common fibre types:


Wool: Known for its natural softness and resilience, wool is a classic choice for plush carpets. It provides a luxurious feel underfoot and is naturally resistant to stains.


Nylon: Recognized for its durability and resilience, nylon is a popular synthetic fibre used in plush carpets. It offers excellent resistance to wear and tear, making it suitable for high-traffic areas.


Polyester: Polyester fibres deliver a plush and soft feel. They are also known for their stain resistance and vibrant colour options, making them a stylish choice for various home settings.


Blends: Some plush carpets are crafted from a blend of different fibres, combining the strengths of each to create a carpet that is both soft and durable.


Navigating Pile Height for Plushness:


Pile height refers to the length of the carpet fibres, and it plays a pivotal role in determining the plushness and appearance of the carpet. Understanding different pile heights allows homeowners to choose a carpet that aligns with their preferences:


High Pile: Carpets with longer fibres create a lush and cosy feel. High pile carpets are ideal for bedrooms and areas where comfort is a top priority.


Medium Pile: Balancing comfort with practicality, medium pile carpets are versatile and suitable for various living spaces. They offer a plush feel without being too extravagant.


Low Pile: Shorter fibres characterise low pile carpets, providing a sleek and polished appearance. These carpets are easier to clean and maintain, making them suitable for high-traffic areas.


Cut Pile vs. Loop Pile: Within plush carpet construction, the choice between cut pile (where the loops are cut) and loop pile (where loops remain intact) further influences the carpet’s texture and style.


Understanding the nuances of plush carpet construction, specifically the fibre types and pile height, empowers homeowners to make informed decisions. Whether prioritising natural softness, durability, or a balance of both, selecting the right combination ensures that your plush carpet not only meets but exceeds your expectations in both form and function.


Colour Considerations: Finding the Perfect Hue for Your Space


Selecting the right colour for your plush carpet is a pivotal decision that can significantly impact the overall aesthetics and ambiance of your living space. The color of your carpet serves as the canvas upon which your room’s design is built, influencing the perception of size, warmth, and style. Here’s a comprehensive exploration of key considerations when finding the perfect hue for your space:


1. Room Size and Light Conditions:


Optical Illusions: Lighter colours tend to create an illusion of spaciousness, making them an excellent choice for smaller rooms. Conversely, darker hues can add cosiness to larger spaces.

Natural Light: Consider the amount of natural light the room receives. Rooms bathed in sunlight can accommodate a broader spectrum of colours, while rooms with limited natural light may benefit from lighter tones to enhance brightness.


2. Existing Decor and Color Palette:


Harmonising with Decor: The colour of your plush carpet should harmonise with existing furniture, wall colours, and decor. Consider complementary or contrasting tones to achieve a cohesive and visually appealing look.

Creating Focal Points: A carpet in a bold colour can serve as a focal point, adding visual interest to an otherwise neutral room. Conversely, neutral carpets allow other design elements to take centre stage.


3. Practical Considerations:


Stain Resistance: Lighter colours are often chosen for their ability to conceal stains and dirt more effectively. However, advancements in stain-resistant technologies have expanded the colour options for practical, family-friendly choices.

Maintenance: Consider the level of maintenance you’re comfortable with. While darker colours may hide dirt, they can show lint and pet hair more prominently.


4. Mood and Atmosphere:


Creating a Mood: Colours evoke emotions and set the tone for a room. Cool tones like blues and greens can create a calming atmosphere, while warm tones like reds and yellows add vibrancy and energy.

Personal Preferences: Your personal preferences play a crucial role. Select a color that resonates with you and complements your lifestyle.


5. Timelessness vs. Trends:


Classic Neutrals: Neutral tones like beige, grey, and cream are timeless choices that adapt well to evolving design trends. They offer flexibility for changing decor elements over time.

Trendy Hues: If you’re drawn to trendy colours, consider incorporating them through accessories and decor items rather than committing to a bold carpet colour that may go out of style.


By carefully considering these factors, you can confidently choose the perfect hue for your plush carpet, ensuring that it not only enhances the visual appeal of your space but also aligns with your practical needs and personal style preferences.


Durability Matters: Balancing Plushness with Longevity


Investing in a plush carpet is an invitation to luxury and comfort, but finding the delicate equilibrium between opulence and durability is essential for a flooring choice that stands the test of time. Here’s an in-depth exploration of how to choose plush carpets that not only exude luxury but also maintain their allure through the rigours of everyday life:


1. Fiber Selection for Durability:


Nylon’s Resilience: Considered the workhorse of carpet fibres, nylon is celebrated for its exceptional durability. It resists wear and tear, making it an ideal choice for high-traffic areas like living rooms and hallways.

Blended Options: Blended fibres, combining nylon with other materials, can offer a balance between softness and durability. This combination often results in a plush carpet that withstands heavy foot traffic while retaining its luxurious feel.


2. Pile Density and Tuft Twist:


High Pile Density: A carpet with high pile density indicates closely packed fibres, contributing to both plushness and durability. Densely woven carpets are more resistant to crushing and matting.

Tuft Twist: The tuft twist refers to the number of times the carpet fibres are twisted together per inch. Higher tuft twists generally enhance the carpet’s ability to maintain its structure and resist signs of wear.


3. Understanding Plush Styles:


Saxony and Textured Styles: While Saxony styles offer a formal and velvety appearance, textured plush carpets can camouflage footprints and vacuum marks more effectively. Textured styles are often recommended for maintaining a plush look in high-traffic areas.

Consider Loop Pile: Loop pile constructions, where the fibres create loops rather than being cut, can be more durable in high-traffic spaces. Berber carpets, for example, are a type of loop pile construction known for their durability.


4. High-Traffic Considerations:


Entryways and Hallways: Areas with heavy foot traffic, such as entryways and hallways, require carpets with enhanced durability. Choosing a carpet with stain resistance and resilience against compression ensures longevity in these spaces.

Stairs: Plush carpets on stairs can be prone to wear due to concentrated pressure points. Opt for a durable fibre and construction designed to withstand the unique challenges posed by stairs.


5. Regular Maintenance for Longevity:


Proper Cleaning Practices: Regular vacuuming, prompt stain removal, and periodic professional cleaning contribute to the longevity of plush carpets. Follow manufacturer guidelines for maintenance to preserve both the appearance and feel of the carpet.

Fluffing and Revitalising: Some plush carpets may benefit from occasional fluffing or grooming to restore their pile and maintain that plush, inviting look.


By understanding the interplay between fibre types, construction styles, and the demands of your living space, you can confidently select a plush carpet that not only exudes luxury but also stands resilient against the trials of everyday life. Balancing plushness with longevity ensures that your investment in opulent flooring pays off for years to come.


plush carpet

Budget-Friendly Plush Carpet Options: Luxury without Breaking the Bank


Embarking on the journey to enhance your living space with plush carpeting doesn’t have to be a financial strain. There are budget-friendly options that provide a touch of luxury without compromising on quality. Let’s delve into strategies for achieving plushness without breaking the bank:


1. Consider Synthetic Fibres:


Polyester and Polypropylene: Synthetic fibres like polyester and polypropylene offer a cost-effective alternative to natural fibres. Polyester, in particular, provides a plush feel at a more budget-friendly price point, making it an excellent choice for those looking to infuse luxury into their spaces without exceeding their budget.


2. Explore Lower Pile Heights:


Plushness on a Budget: Opting for a carpet with a lower pile height can be a smart move for those seeking budget-friendly plush options. While it may not have the same extravagance as high-pile carpets, a well-chosen lower-pile option can still provide a comfortable and stylish feel underfoot.


3. Shop Smart During Sales and Promotions:


Seasonal Sales: Keep an eye out for seasonal sales, promotional events, and clearance offerings from carpet retailers. Many businesses offer discounted prices during specific times of the year, providing an opportunity to snag a plush carpet at a more affordable rate.


4. Explore Remnants and Overstock:


Remnant Sections: Carpets available in remnants or leftover rolls can be significantly more budget-friendly. While the selection might be limited, this approach can be an excellent way to find a high-quality plush carpet at a fraction of the cost.


5. DIY Installation to Save Costs:


DIY-Friendly Carpets: Some carpets are designed with DIY installation in mind, reducing the need for professional installation costs. Be sure to follow manufacturer guidelines for self-installation to ensure a successful and cost-effective process.


6. Focus on Neutral Colours:


Timeless Neutrals: Neutral-coloured carpets, such as beige, grey, or taupe, are not only versatile but also tend to be more budget-friendly. These colours can seamlessly blend with various decor styles and are less likely to show wear and tear.


7. Explore Online Retailers and Local Shops:


Online Deals: Explore online carpet retailers for potential deals and discounts. Many online platforms offer a wide range of plush options at competitive prices.

Local Shops: Check with local carpet shops for in-store promotions and exclusive deals. Establishing a relationship with local businesses may also open the door to special pricing opportunities.


8. Utilise Financing Options:


Flexible Financing: Some retailers offer financing options that allow you to spread the cost of your plush carpet over time. This can make higher-end options more accessible without requiring an immediate, substantial upfront investment.


By adopting a strategic approach to your carpet selection and leveraging available opportunities, you can achieve the plushness you desire within your budget constraints. Remember, luxury and comfort can be attainable without compromising your financial goals.


Caring for Your Plush Carpet: Maintenance Tips and Tricks


Congratulations on investing in the plush luxury of your new carpet! To ensure it retains its beauty and comfort for years to come, it’s crucial to establish a thoughtful care and maintenance routine. Here’s a comprehensive guide addressing common concerns, including cleaning and stain removal, to keep your plush carpet in impeccable condition:


1. Regular Vacuuming:


Frequency: Vacuum your plush carpet regularly to prevent the accumulation of dirt, dust, and debris. High-traffic areas may require more frequent vacuuming.

Use a Quality Vacuum: Invest in a high-quality vacuum cleaner equipped with adjustable height settings to ensure effective cleaning without causing damage to the carpet fibers.


2. Immediate Stain Removal:


Act Quickly: Address spills and stains promptly to prevent them from setting into the carpet fibres. Blot the stain with a clean, absorbent cloth or paper towel to soak up as much liquid as possible.

Gentle Cleaning Solutions: When cleaning stains, use a mild cleaning solution. Mix a small amount of dish soap with water or consider specialised carpet cleaners. Always test a small, inconspicuous area first to ensure compatibility.


3. Professional Cleaning:


Schedule Regular Professional Cleaning: Even with regular vacuuming, professional cleaning is essential to maintain the plushness and appearance of your carpet. Aim for a professional cleaning at least once a year, or more frequently in high-traffic areas.


Steam Cleaning: Steam cleaning is an effective method for deep cleaning plush carpets. It helps remove embedded dirt and allergens, rejuvenating the carpet’s fibres.


4. Use Rugs and Runners:


Protect High-Traffic Areas: Place rugs or runners in high-traffic areas, such as hallways and entryways, to minimise wear and tear on specific sections of the carpet.

Rotate Furniture: Occasionally rearrange furniture to distribute the weight and impact on the carpet evenly.


5. Avoid Harsh Chemicals:


Gentle Cleaning Agents: Refrain from using harsh chemicals or bleach on your plush carpet, as these can damage the fibres and affect the colour. Stick to mild, carpet-friendly cleaning solutions.


6. Preventative Measures:


Door Mats: Place doormats at entrances to reduce the amount of dirt and moisture brought into your home, minimising the risk of stains.

No Shoes Policy: Consider implementing a no-shoes policy to prevent outside dirt and debris from being tracked onto your plush carpet.


7. Fluffing and Grooming:


Revitalise Pile: Periodically fluff and groom your plush carpet to restore its pile and maintain a uniform appearance. Use a carpet rake or a vacuum cleaner with a grooming attachment for this purpose.


8. Professional Inspection:


Regular Checkups: Schedule periodic professional inspections to assess the condition of your carpet. Professionals can identify potential issues and provide recommendations for maintenance or repairs.


By incorporating these maintenance tips and tricks into your routine, you’ll not only preserve the plushness and beauty of your investment but also extend the lifespan of your carpet, ensuring it continues to be a source of comfort and elegance in your home.


In conclusion, your decision to invest in a plush carpet is not just about elevating your home’s aesthetics but also embracing a lifestyle of comfort and luxury. By understanding the nuances of plush carpet construction, colour considerations, and proper maintenance, you’ve embarked on a journey to create a living space that radiates warmth and sophistication.


At The Fitted Carpet Co., we understand the importance of finding the perfect fitted carpet to suit your unique style and preferences. Our wide range of premium options, from high-quality fibres to an array of colours and styles, ensures that you’ll discover the ideal plush carpet to transform your living spaces.


To explore our collection and take the next step toward enhancing your home with the unparalleled comfort of plush carpets, we invite you to visit our website. There, you’ll find a showcase of our exquisite offerings, along with additional resources to guide you through the decision-making process.


If you have any questions or would like personalised assistance in choosing the perfect fitted carpet for your home, our dedicated team is here to help. Feel free to contact us at 01580 753483 or thefittedcarpetcompany@gmail.com. We look forward to the opportunity to turn your vision of a luxurious, plush living space into a reality.